


Smoking a brisket
Oklahoma Style Beef Brisket

Oklahoma knows BBQ
Living only miles from the Oklahoma/Texas border means I've been around BBQ most of my life. We take it for granted here in rural Southeastern Oklahoma. I first realized this around 2003, when I took a remote job in New Jersey. I’d spend 2-3 weeks at a time on the East Coast and quickly realized that, while there were lots of things concerning food that the East Coast did better than us (sushi, seafood, philly cheesesteaks) they don’t have a lot of good options when it comes to BBQ.
I remember flying in to Philly one time and having one of the team members say “We have found an incredible BBQ joint up here, and we think you’re gonna love it.” I couldn’t wait to try it out. We went for lunch that day. When we got there the guy was so nice, and I recall him saying “Oh you’re in for a treat today guys, the ribs and the brisket just got finished.” I couldn’t wait to try the BBQ and judge it against the meats that I can easily find in almost any town in the Southeastern Texoma area.
To my disappointment, biting in to the first rib was almost a painful experience, they were tough; and they weren’t very flavorful. “Okay,” I thought to myself, “but the brisket must be good. Who can mess up a brisket?” I should have known from how hard I had to cut on it with my knife while holding it in place with my fork. This was going to be more of the same.
Why was the BBQ so tough?
A few times now, I’ve thought about the above experience and wondered why the BBQ was so terrible. Again, growing up around BBQ my whole life it seems so simple you can’t mess it up. That being said I think the key was that the East Coast BBQ was rushed. YOU CAN NOT RUSH BARBEQUE! This was likely the reason that the BBQ business didn’t last in New Jersey. Everyone up there loved it, but keeping up with a large customer base can be hard when all you have is a tiny smoker out back. The smoker was a nice trailer-pull smoker the guy had brought from Texas (although I do not think he was from Texas since he didn’t know how to cook BBQ). He showed it to me and was so excited to tout its amazing ability to cook (in his opinion) great meats. Honestly, the smoker probably was great, but sometimes the fast pace of the east coast can cause people to rush things that just should not be rushed. I’ll say it one more time in case you missed it: YOU CAN NOT RUSH BARBEQUE.
I remember telling my friends and co-workers, that if they thought that was good, they needed to come to Oklahoma so they could try some real BBQ.
The science behind slow cooking
Scientifically, slow cooking meats develops flavors by allowing the meats to absorb the seasonings, breaking down muscle fibers, making the meat more tender. In cuts like Brisket that have more fat, keeps the meat from drying out by retaining moisture. At around 160°F, the collagen in the brisket breaks down and dissolves into gelatin, which adds a rich, tender, and moist texture to the meat. All of this results in tender, juicy meats that are full of flavor. If you’ve never experienced it, the flavors that this science captures are some of the best you’ll ever taste.
Cooking brisket
Shopping for the brisket
Brisket is expensive. Typically, at our local Sam’s Club, we’ll pay somewhere in the neighborhood of $4.28/pound and will weigh somewhere in the neighborhood of 10-15 pounds. This means the average cost of a good quality brisket is somewhere between $50 and $70 dollars. That sounds expensive, but you can eat brisket multiple days so the price isn’t terrible. You’ll also be paying for some fat caps that will ultimately be taken off if you follow this recipe. That means you’ll likely end up with about 7 pounds of meat after you trim a ten-pound brisket.
If you’re extremely lucky, you can find meat that is closer to the best-by date, which means you’ll need to plan to cook it sooner. This can reduce the price but does mean that you have to prep and cook your brisket within a day or two of purchase. You should never freeze brisket if at all possible.
Trimming the brisket
As mentioned earlier, you’re going to trim about 20-30% of your brisket. This is so the excess fat doesn’t render fully during cooking (which leaves greasy meat that no one wants to eat). Properly trimming your brisket ensures the meat cooks evenly and allows seasoning to become more flavorful.
What to trim
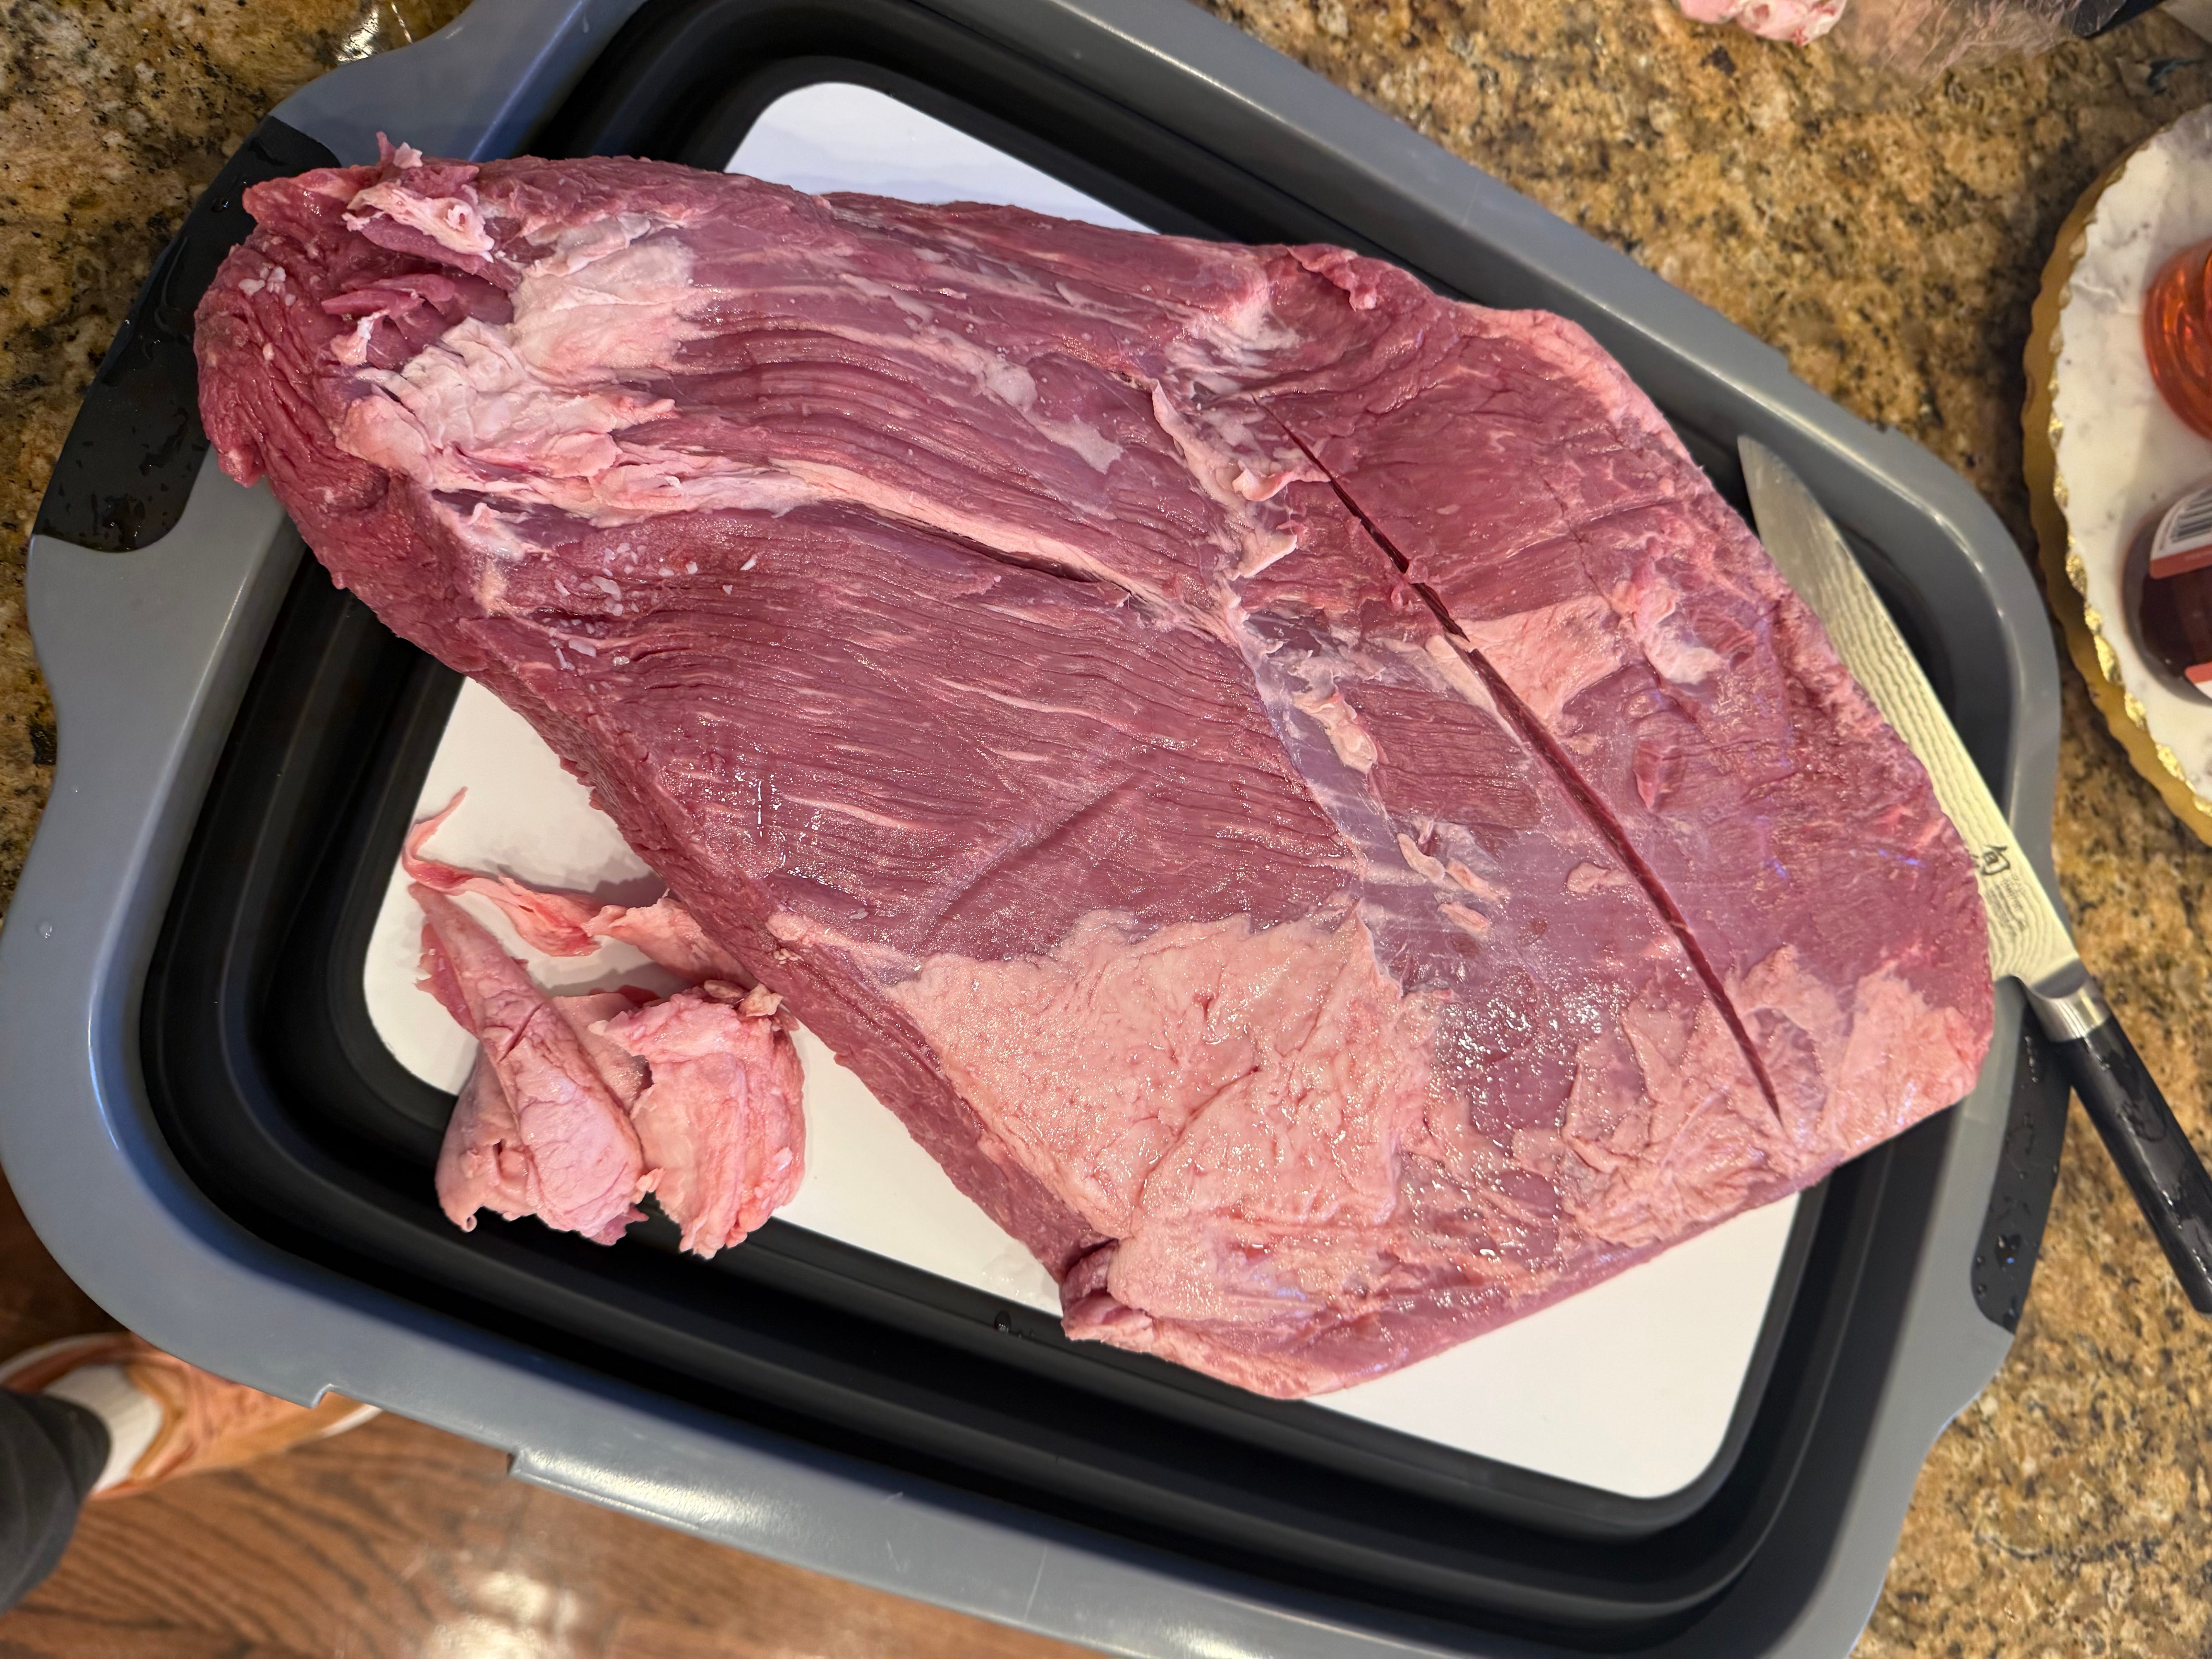
Knowing what to cut off of your brisket is key. While you can’t mess up by cutting too much, you will waste meat if you don’t know what to cut. You should cut the fat off with a sharp knife on a cutting board or prep tub.
Trimming the Fat Cap: The fat cap is the thick layer of fat on one side of the brisket. This is usually trimmed down to about 1/4 inch thickness allowing for enough fat to hold the moisture and flavor without being excessively fatty and greasy.
Silver Skin: Any tough tissue (that looks like silver skin) on the non-fat side should be removed.
Hard Fat: Thick, hard chunks of fat don’t render well and are typically trimmed away.

You’ll expect to cut away 2-4 pounds of fat from a typical 10-15 pound brisket at bare minimum. While I don’t typically keep the fat, a lot of people save these trimmings for other uses, like rendering beef tallow or making your own sauce.
Seasoning the meat
There are a million and one “best ways” to season your brisket, and these will widely vary depending on who you ask. For Texas/Oklahoma-style brisket we typically don’t use any saucy rubs (just a splash of mustard) and will apply any kind of sauce after we’ve cooked the brisket. To each his own, but my favorite way to season a brisket is 50% salt and 50% coarse black pepper mixed in a bowl to taste (sometimes folks will add a little garlic powder, onion powder, or paprika too). Regardless of what you use remember to keep it simple.
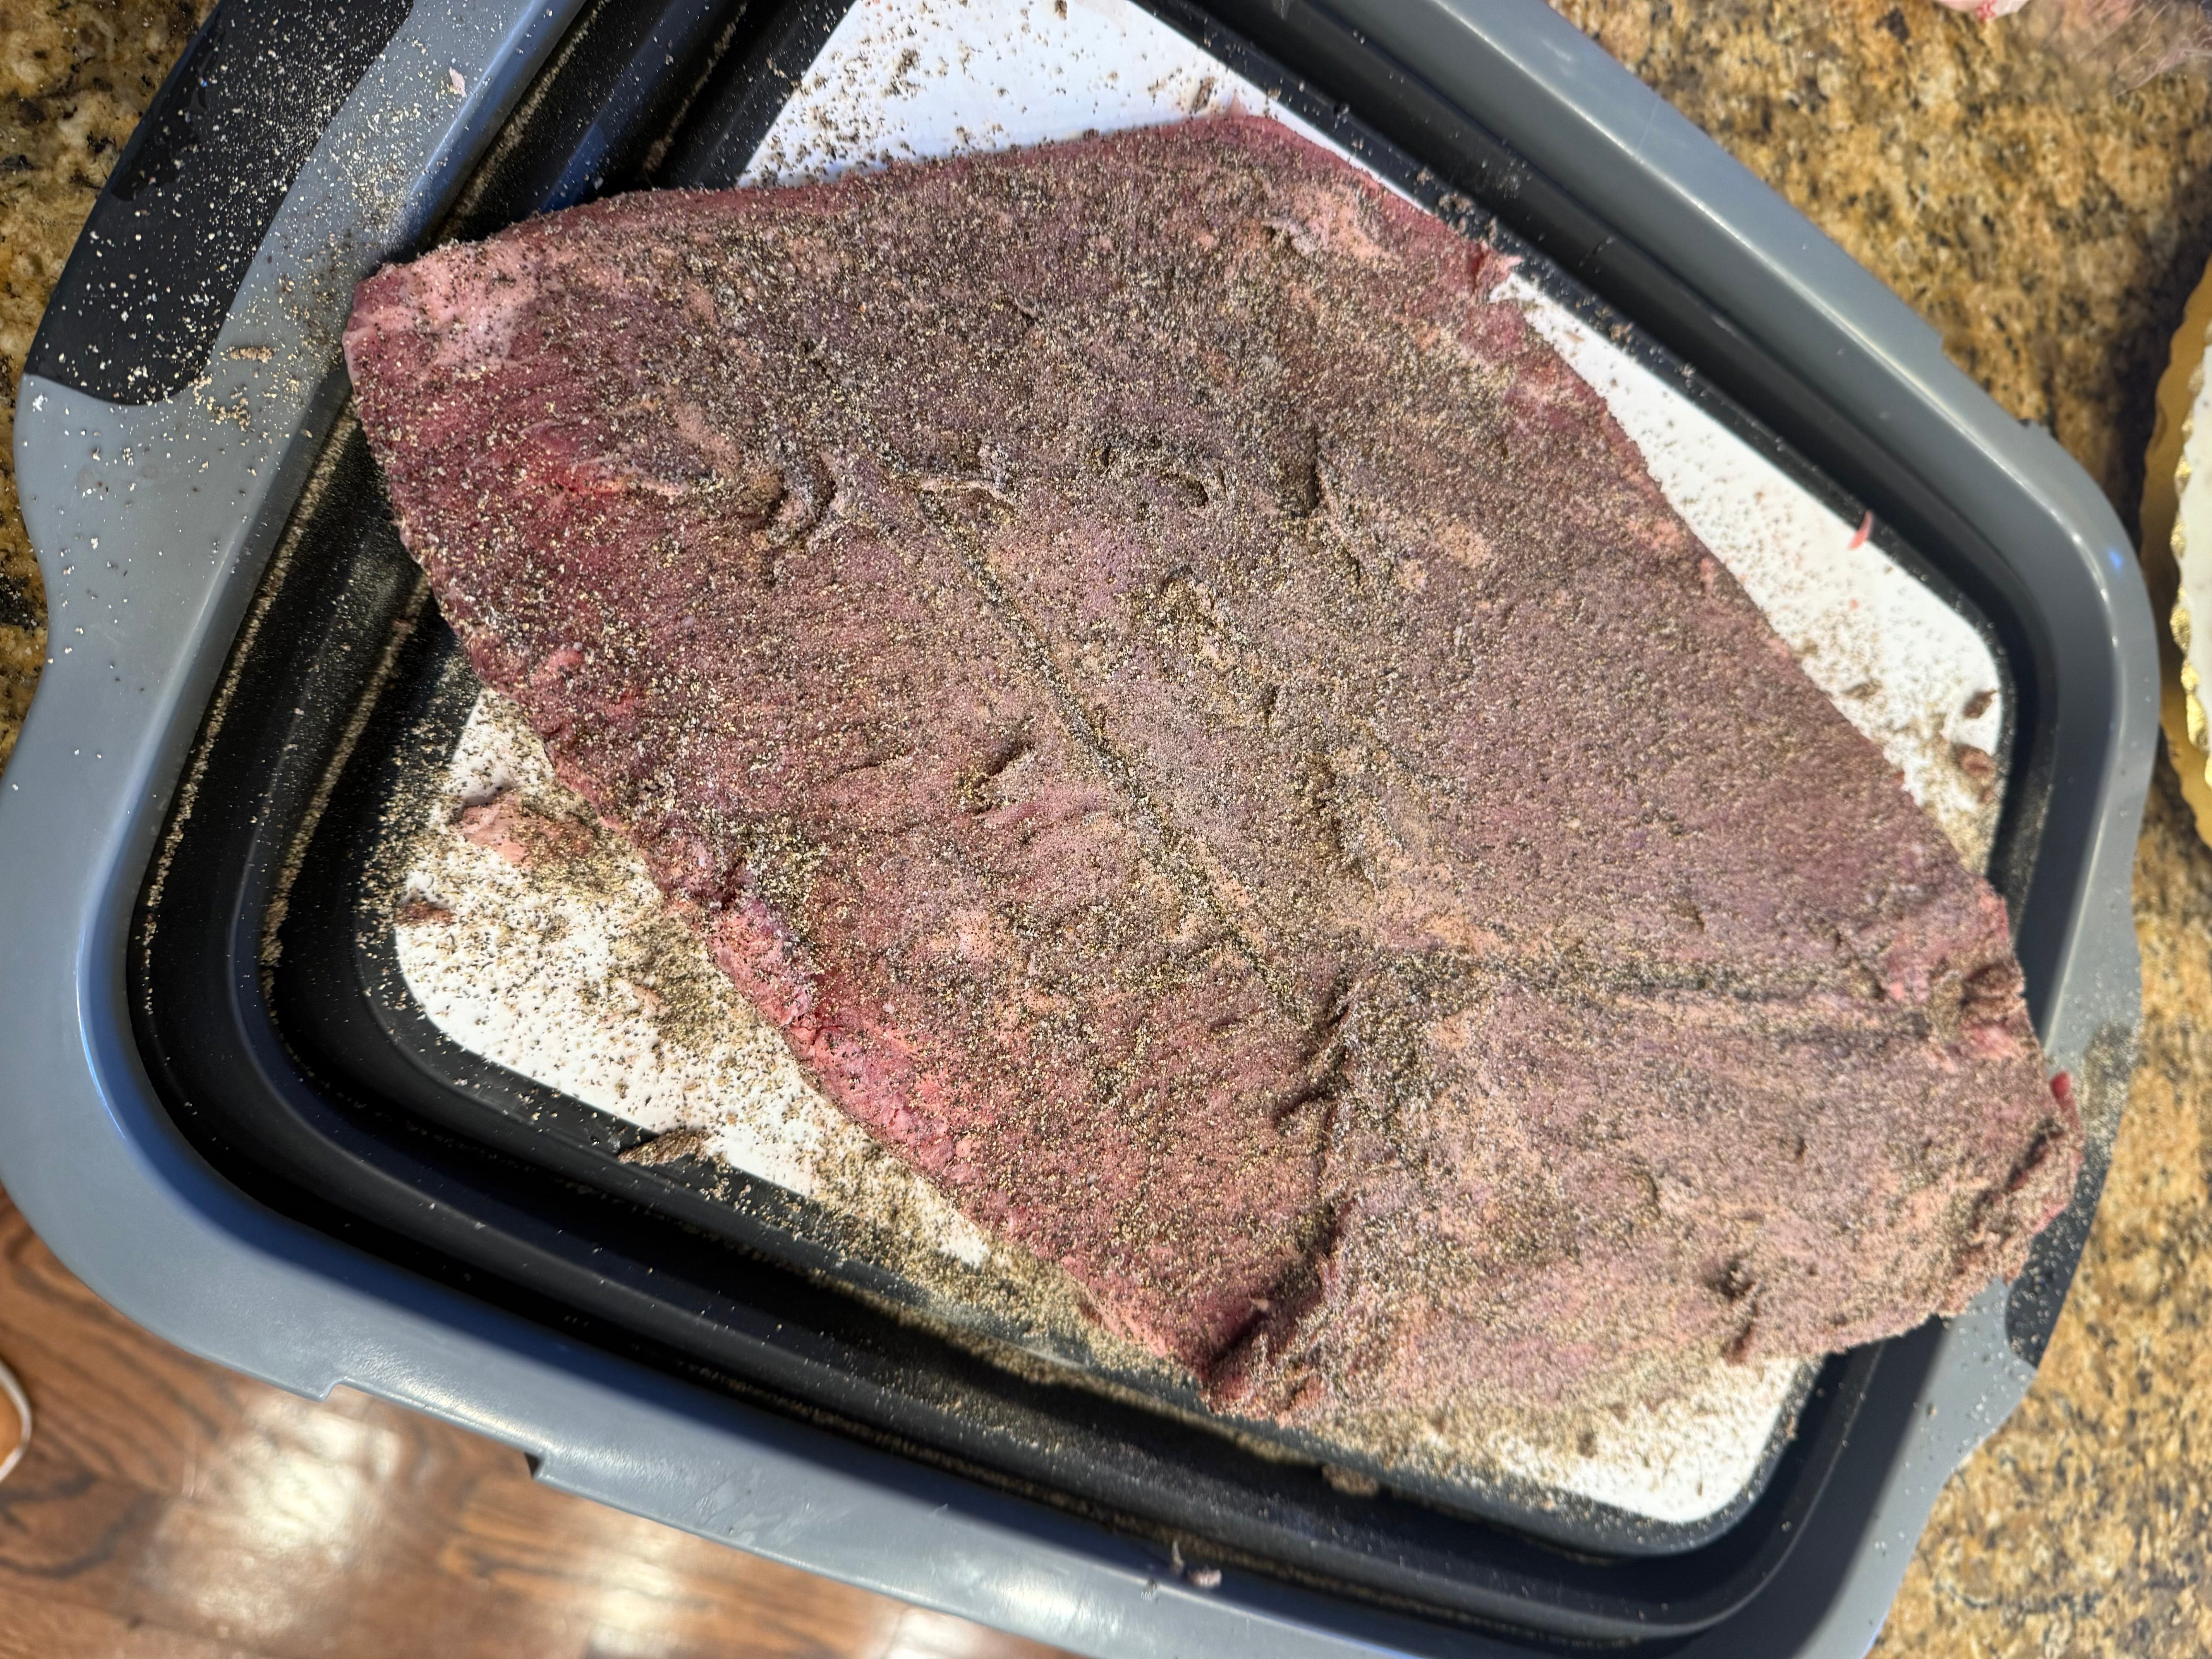
Before applying the rub, pat dry your meat with a paper towel, as this helps the rub stick to the meat. Generously sprinkle the trimmed brisket with the blend. After you have a good amount of seasoning in a particular area, you should rub it in with your hands, making sure that every piece of the meat is covered with the seasonings. Keeping the seasoned meat in a refrigerator will help dry the surface and improve the flavor and “bark” of the smoked brisket during cooking. If you’re short on time you can let the seasoning sit for a minimum of 1-2 hours before cooking. For best results, I recommend you let the seasoned brisket rest uncovered in the refrigerator for 12-24 hours (Overnight Dry Brining) which will extend the flavor and texture of the meat.
Starting the fire and preparing the cooker
I will typically cook on the Big Green Egg, but I also highly recommend the Orion Cooker as a great way to cook meats for anyone looking for a more affordable option (also sometimes faster due to the pressure-cooking nature of the smoker). Both of these are great charcoal-based grills that hold in tons of flavor.
This is another part of the process that does take a little time. Getting the temperature just right (225-250°F) and keeping it there is a key part of cooking your brisket to perfection. I like to use the charcoal chips, as they give the meat a great smoky flavor while leaving out the gaseous taste. I also love adding small amounts of wood to the smoker (Post Oak is a personal favorite of mine). Thanks to my father-in-law who cuts massive amounts of small logs for me, I’m never in need but you can buy wood chips for smoking at your local Academy or Bass Pro.
Keeping the fire at the consistent temperature for more than 10 minutes usually indicates that the fire is ready for cooking. The last thing I do is put a tin pan down into the fire. This does a few things that are beneficial:
Indirect heat: placing the pan between the charcoals and the grill keeps the fire from directly touching the brisket.
Flavoring with beer: I like to open a beer and pour it into the pan. This will create additional flavor and moisture, especially in the Big Green Egg.
Makes cleaning easier: The pan will catch most of the drippings meaning that a lot of the grease doesn’t fall down into your egg.
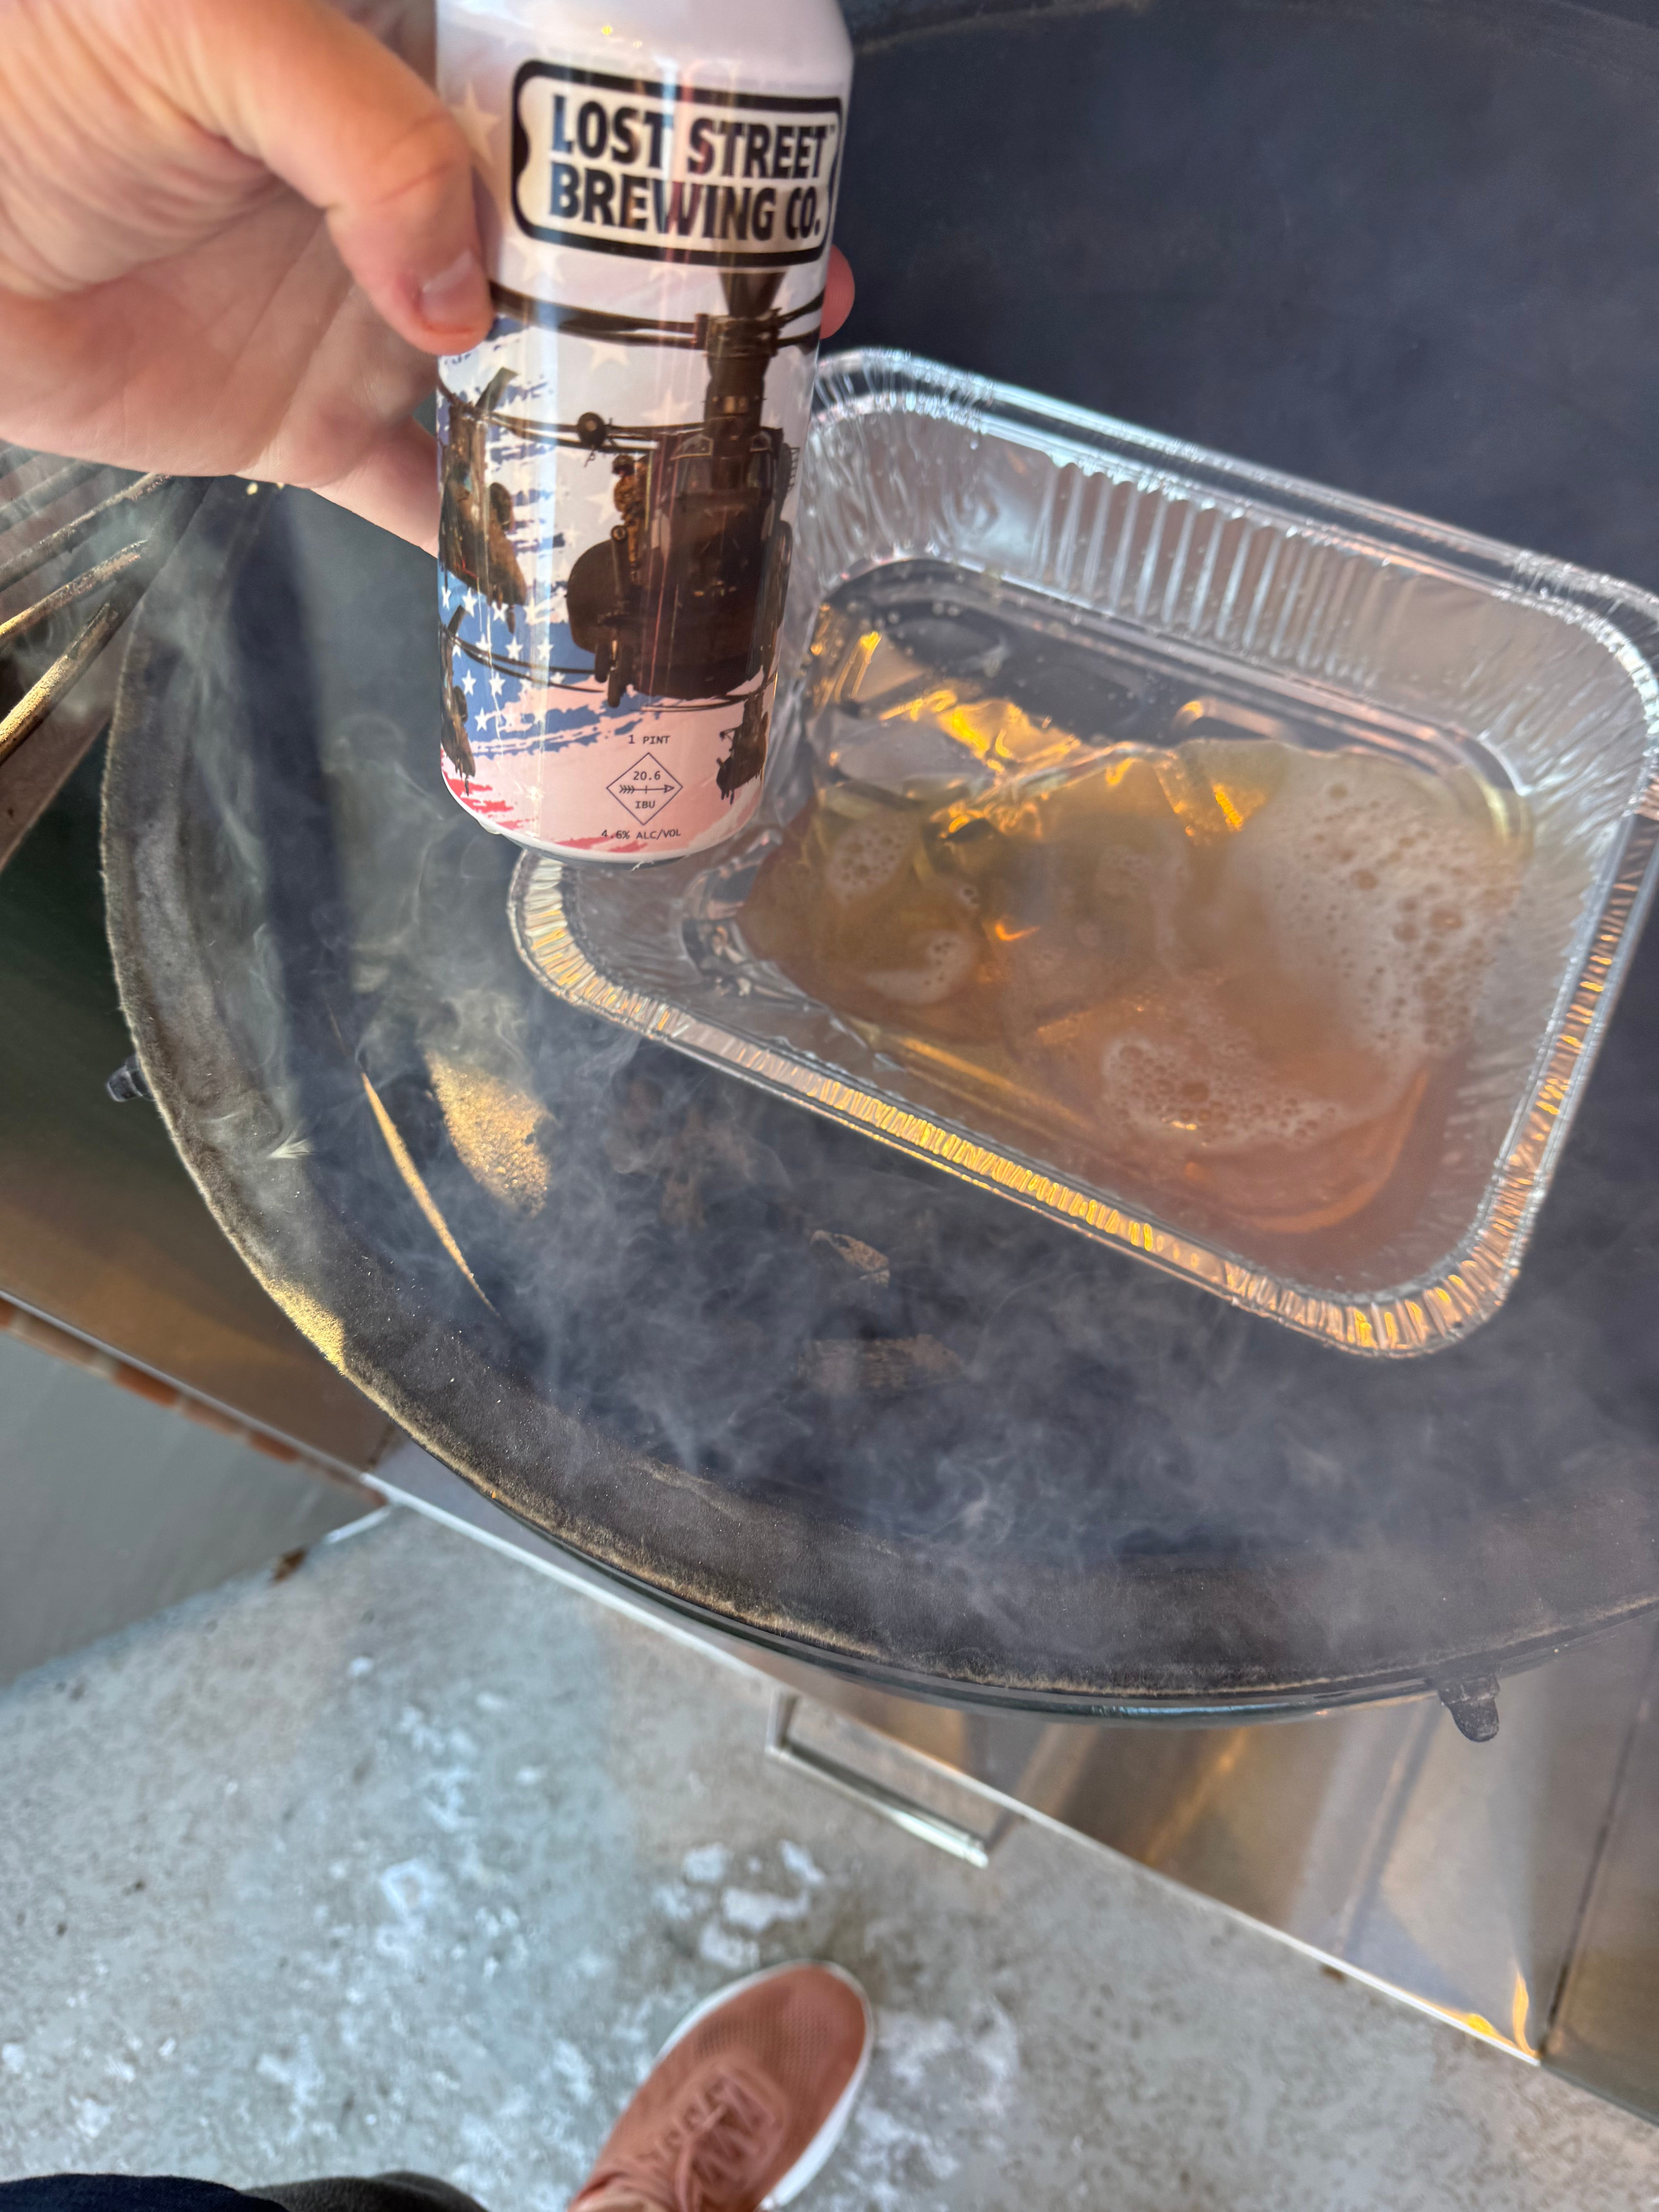
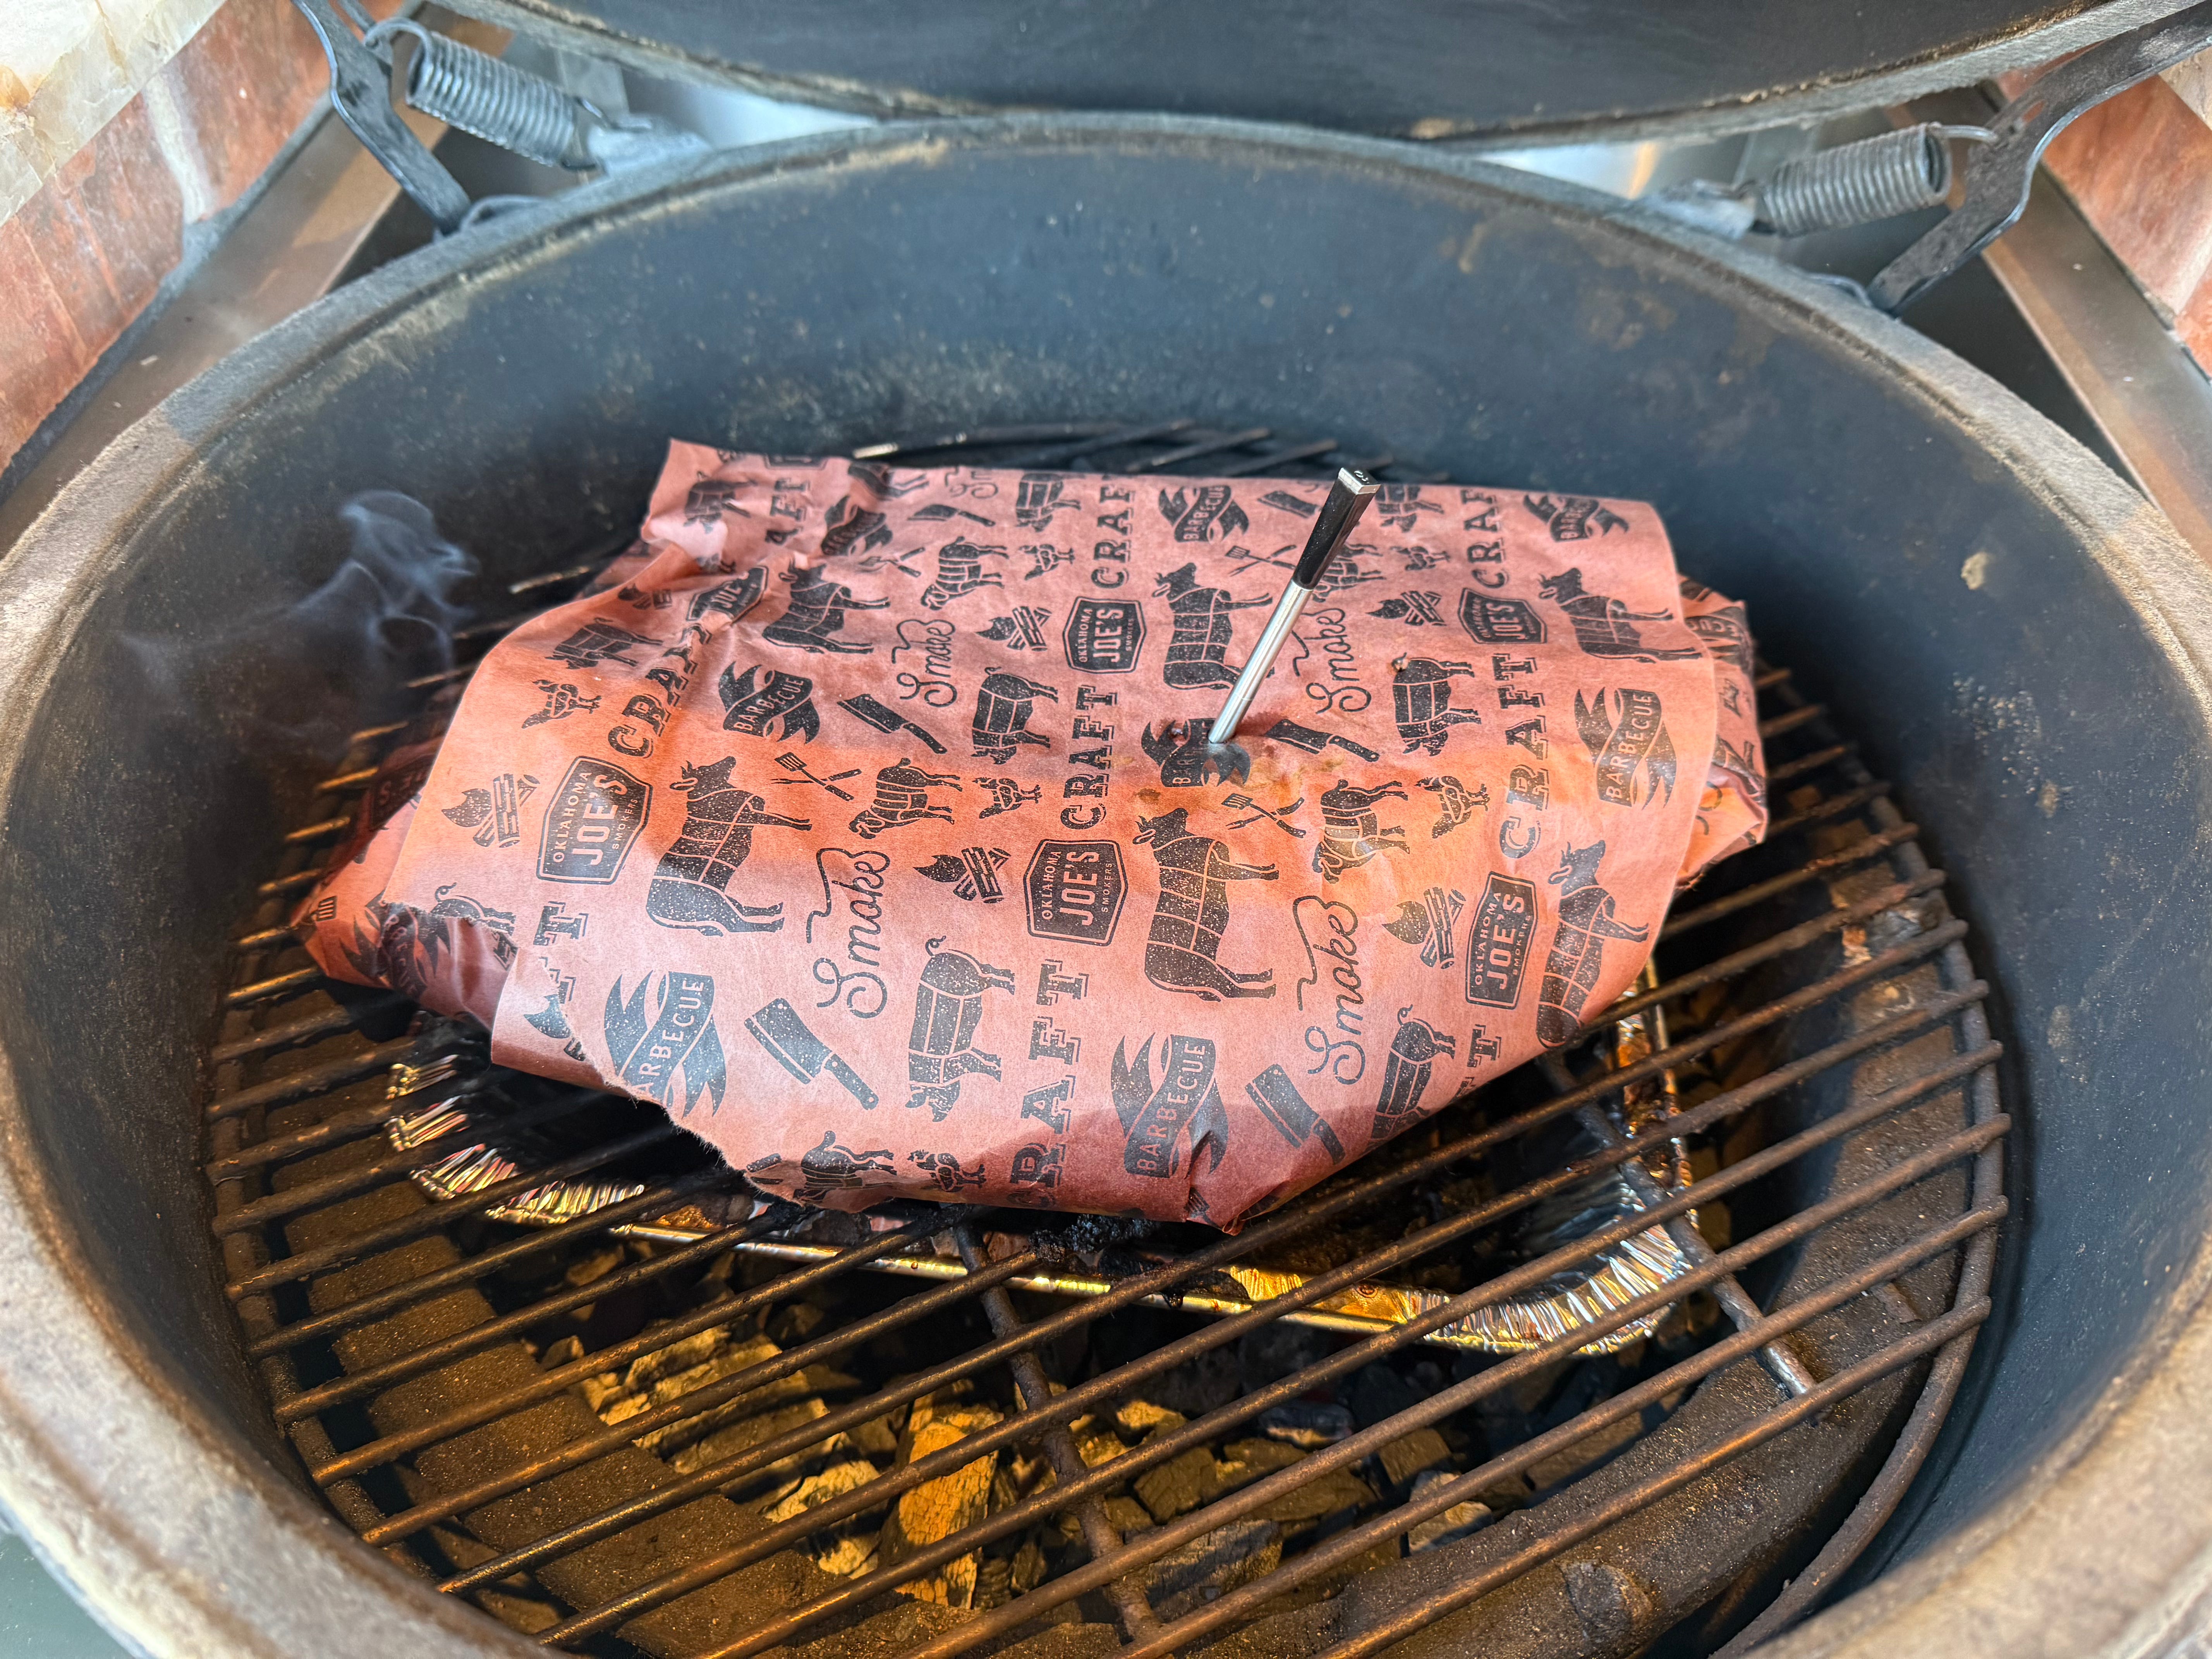
You are now ready to put the brisket (fat-cap side down) onto the grill.
The first cook
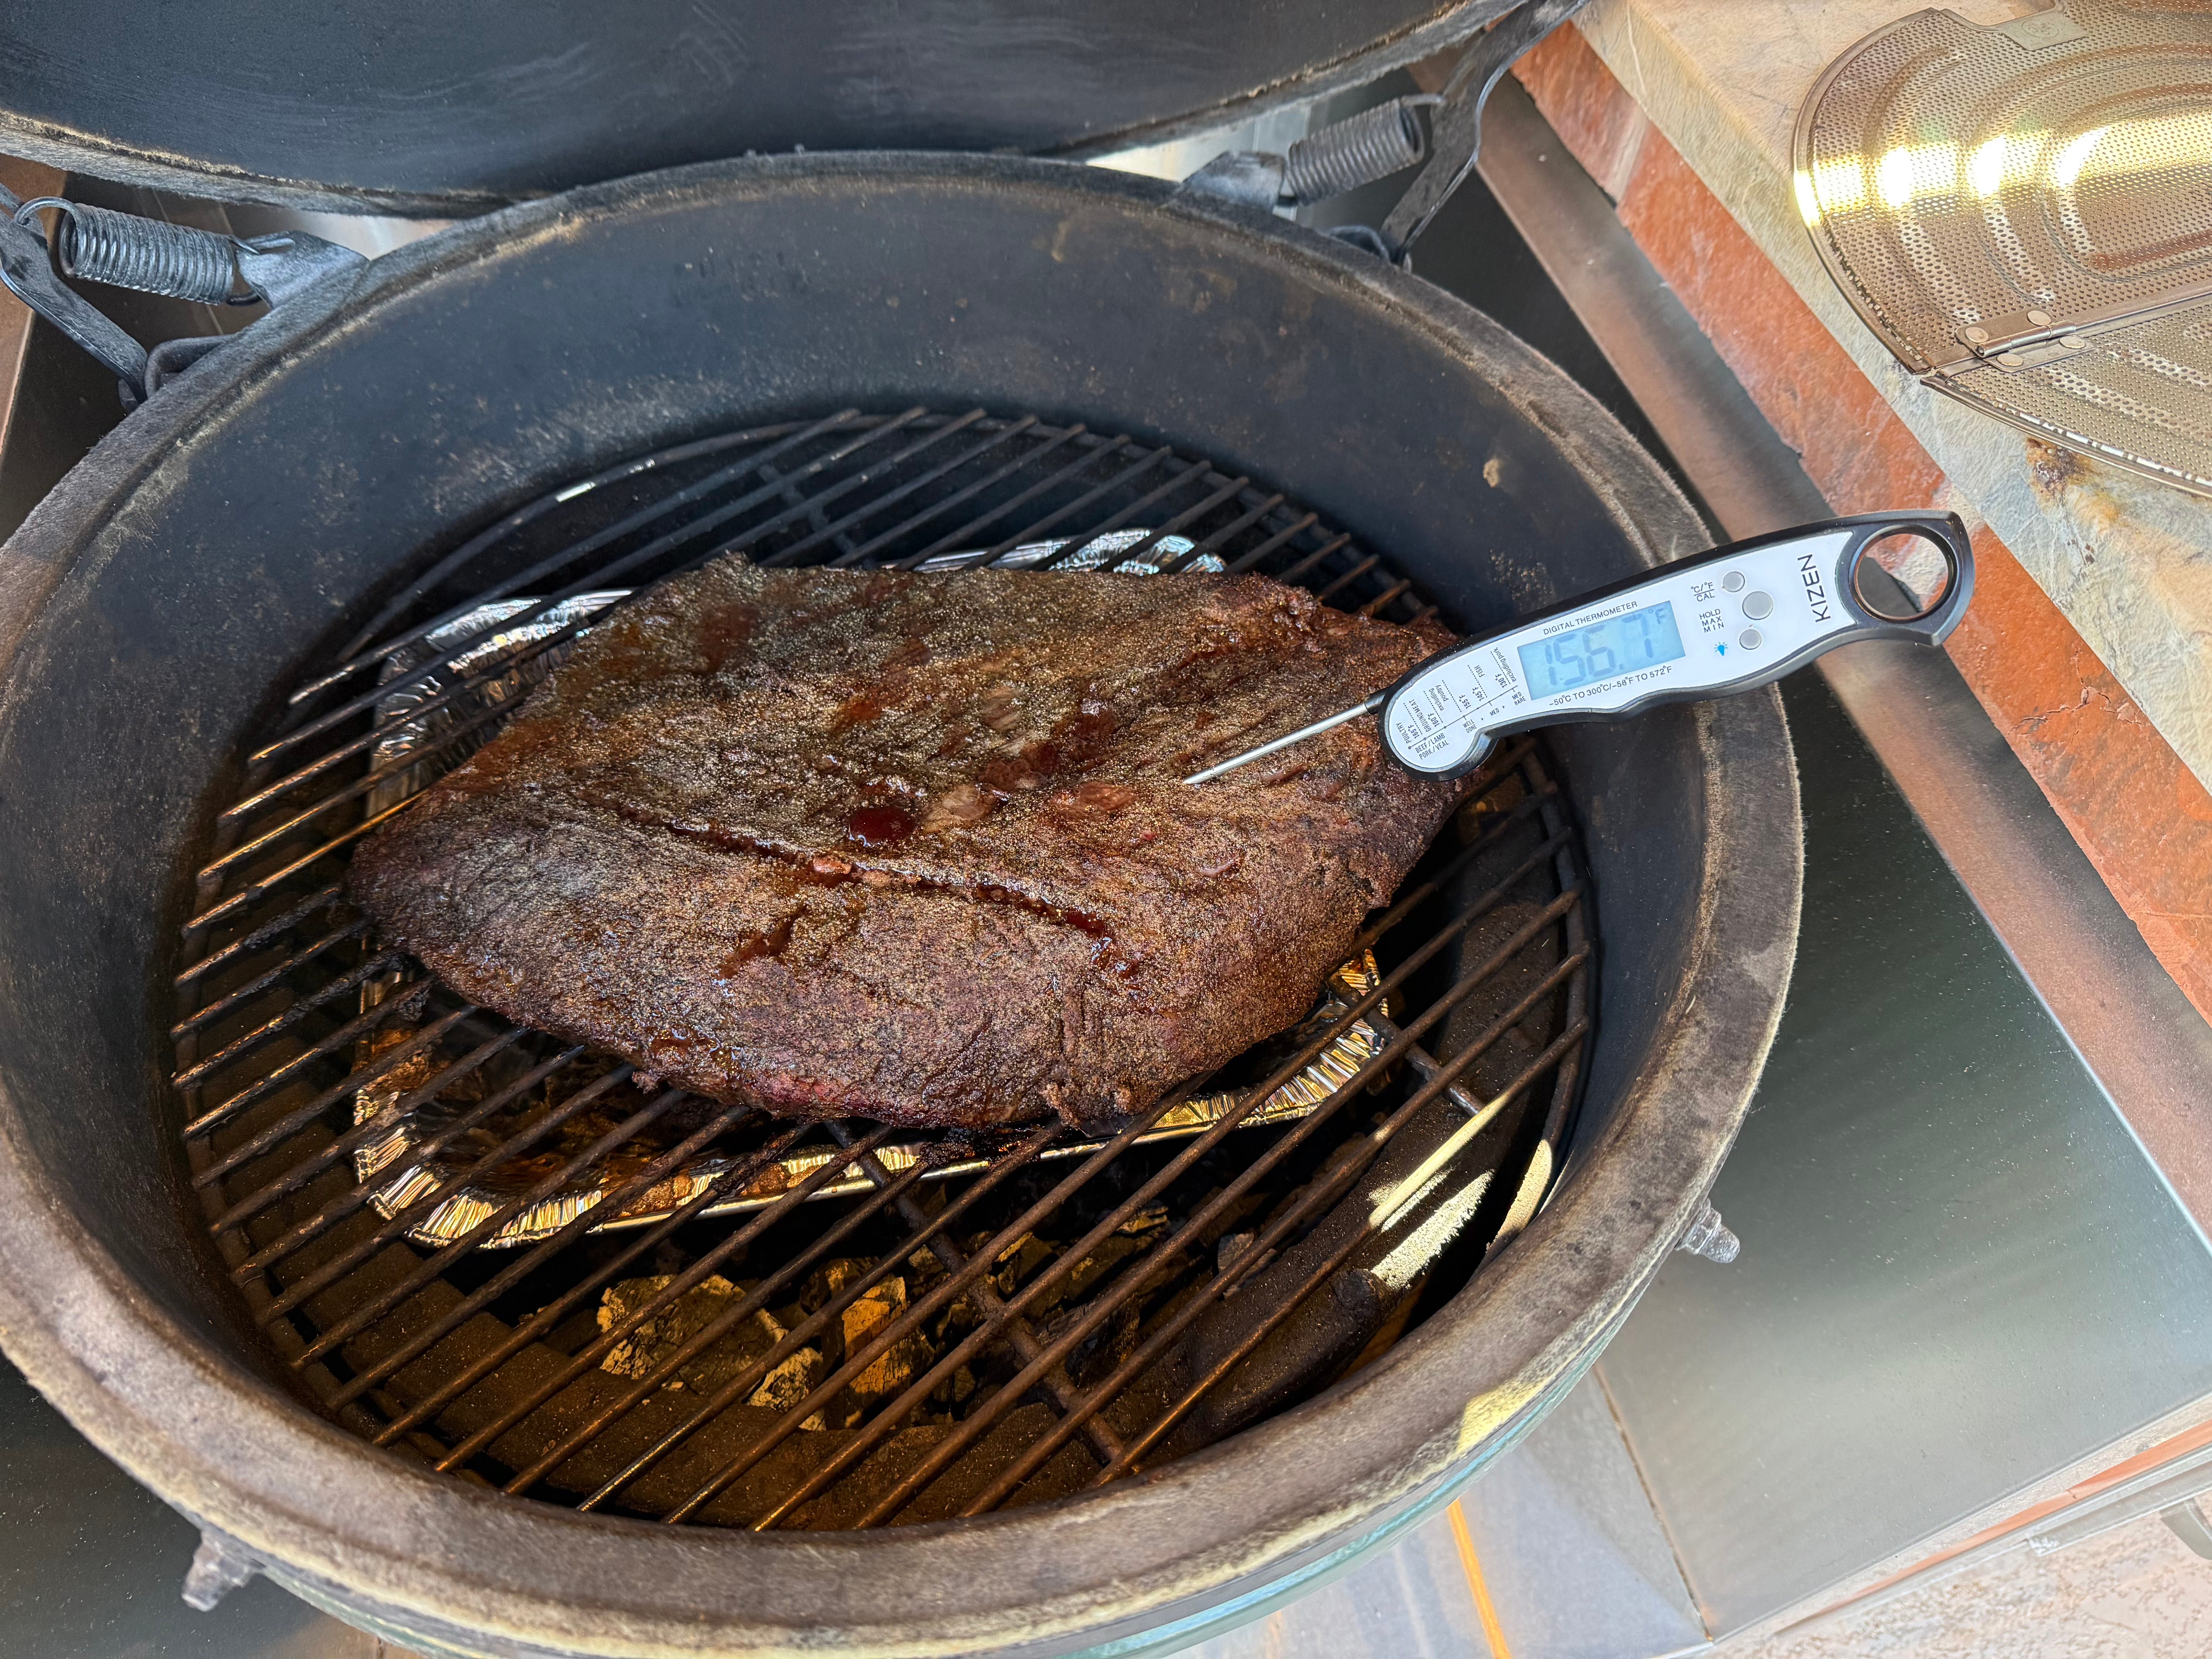
The first thing we should do is cook the brisket to 162-165°F. I use the Meater Block Pro XL wireless probes to monitor the temperature and knowing exactly when to pull the meat. Now we wait for the brisket to stall! This is when the brisket stops rising in temperature (or at least slows) for a short period of time (usually between 150-170°F) releasing flavor and tenderness into the brisket.
Wrapping the brisket and finishing the cooking process
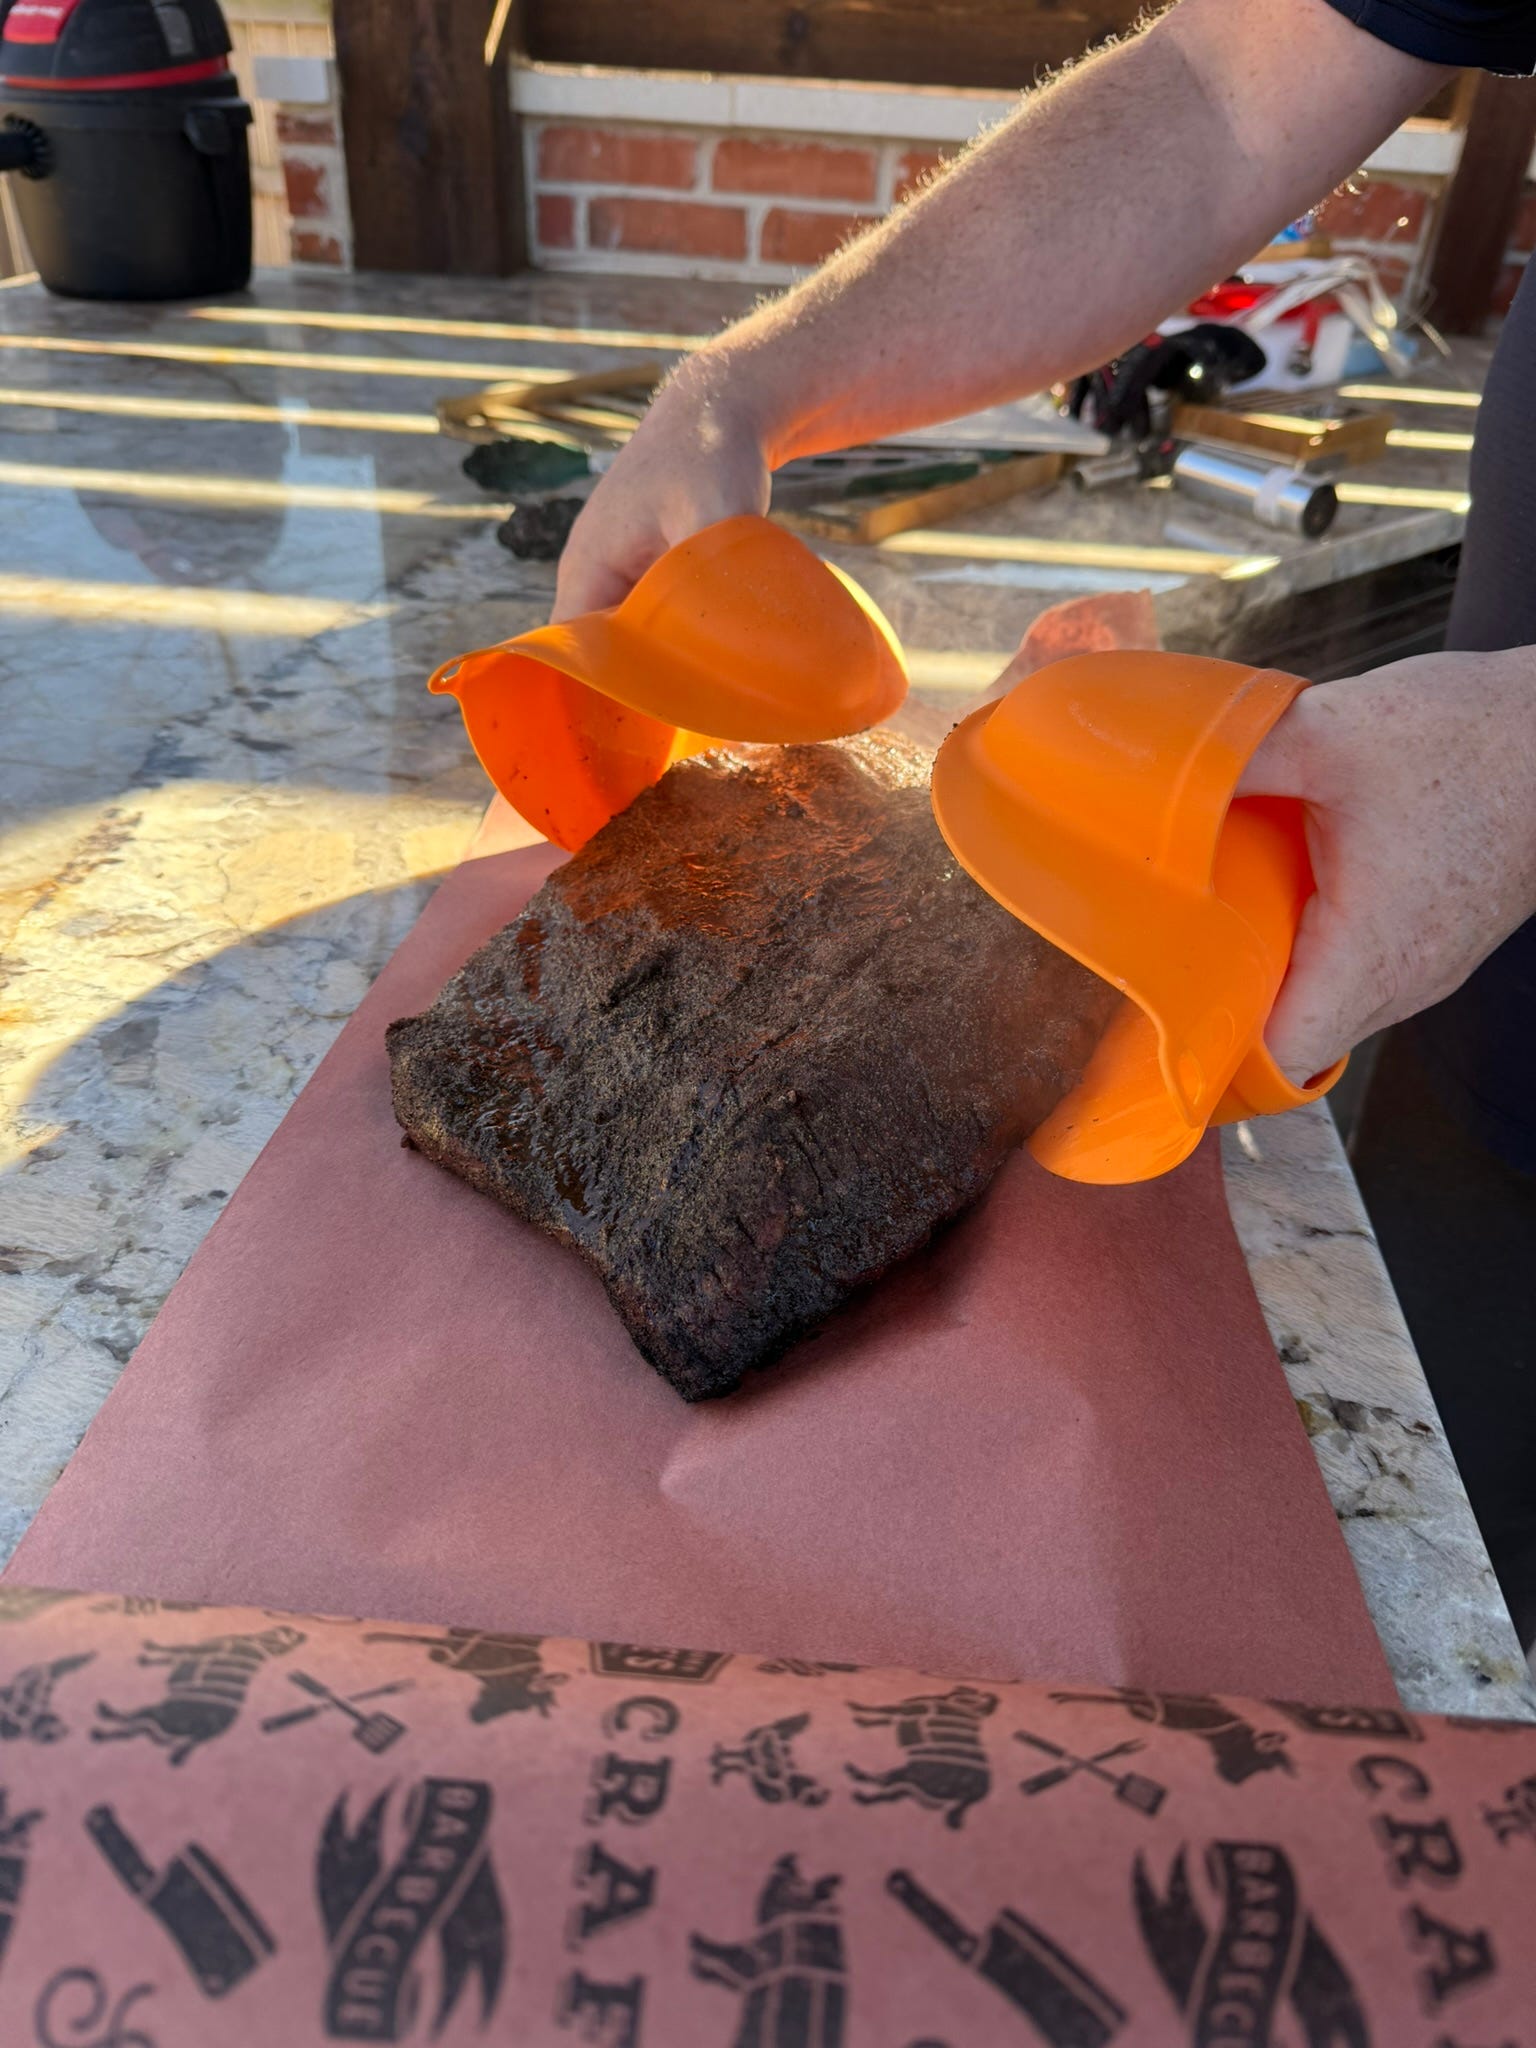
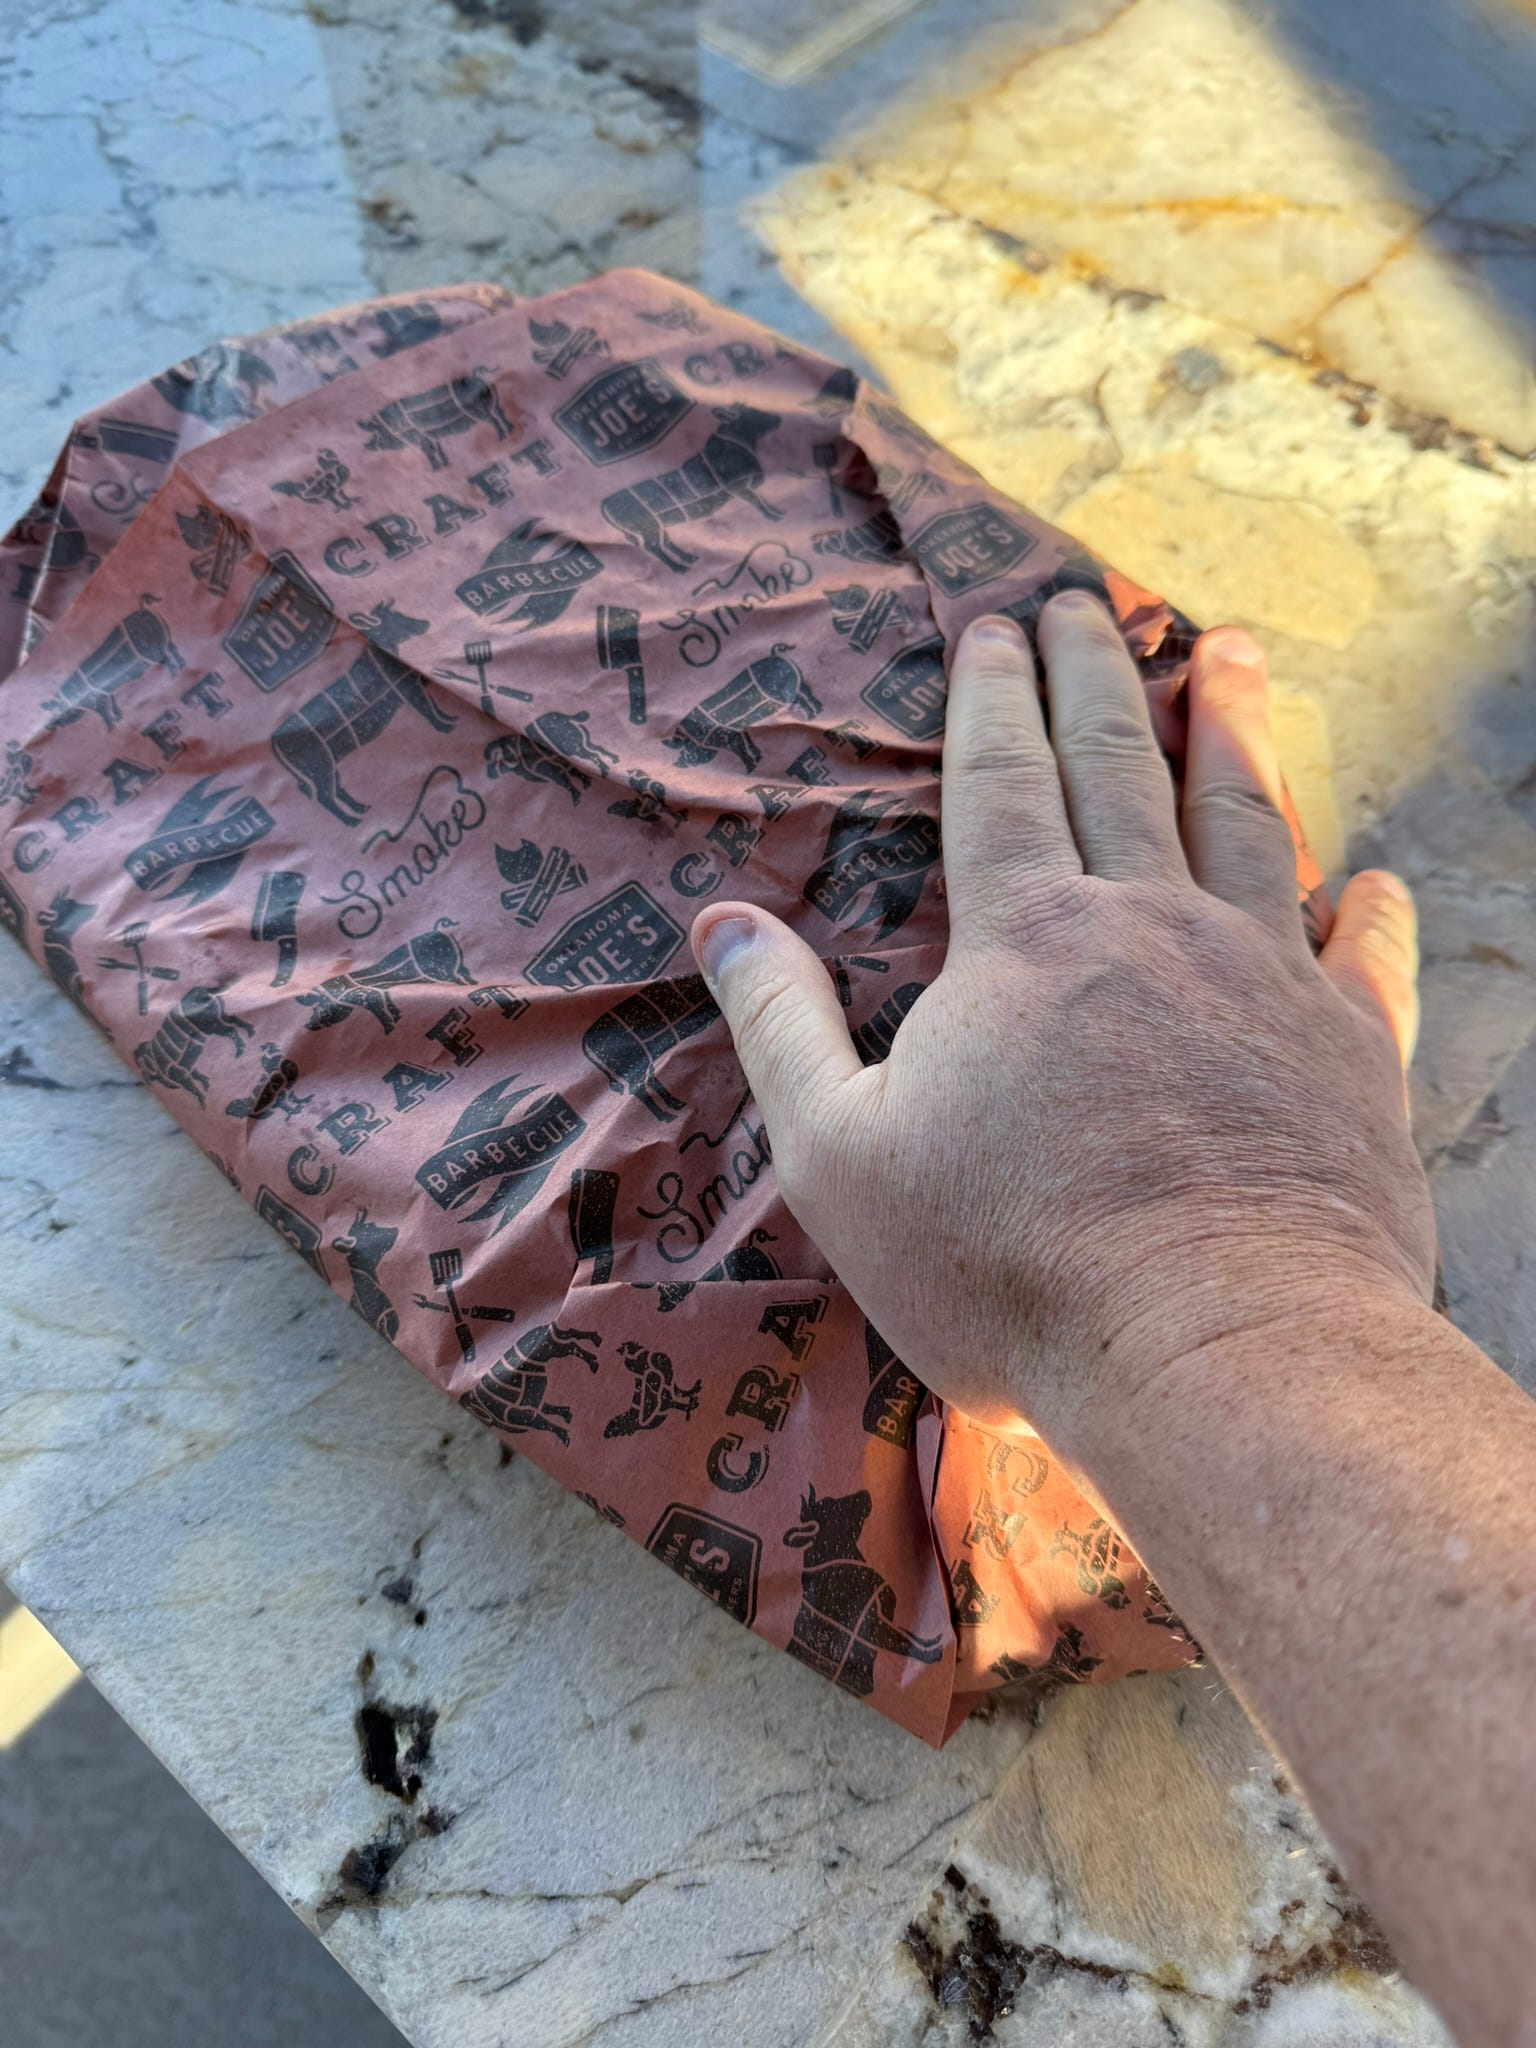
When the brisket stalls (when the temperature hits around 165°F), you’ll want to take it out of the smoker and wrap it tightly in some Oklahoma Joe’s Butcher Paper. This paper is made from peach wood, which helps allow the smoke to keep penetrating the meat it’s wrapped around, holding in a few extra notes of flavor. I recommend double layering to prevent tearing and to ensure a tight wrap. I’m also picking the meat up using the EZ Drip BBQ Grill Mitts which I highly recommend.
Why do you use Butcher Paper?
Butcher Paper is a key part of the process for a few different reasons:
Retains moisture without impacting the brisket “bark”: Butcher paper is breathable, which allows some moisture to escape while trapping enough to keep the brisket moist. This helps preserve the texture of the outer bark of the brisket and prevents it from becoming soggy.
Speeds up cooking: Wrapping brisket in butcher paper reduces evaporation while still allowing heat (and smoke) to penetrate. This helps cook the brisket more evenly and quickly, shortening the time spent in the smoker.
Smoky flavor: We want the moisture to stay in but want to allow the heat and smoke to kiss the brisket’s bark. This can’t be achieved with something like aluminum foil which wraps more tightly and holds more heat and moisture in.
Food safe: Butcher paper is made specifically for food use and is strong enough to handle high temperatures without catching fire or tearing during the cooking process.
Never use aluminum foil, as it traps too much moisture, making your outer “bark” soggy. Foil can also steam the meat, which impacts flavor.
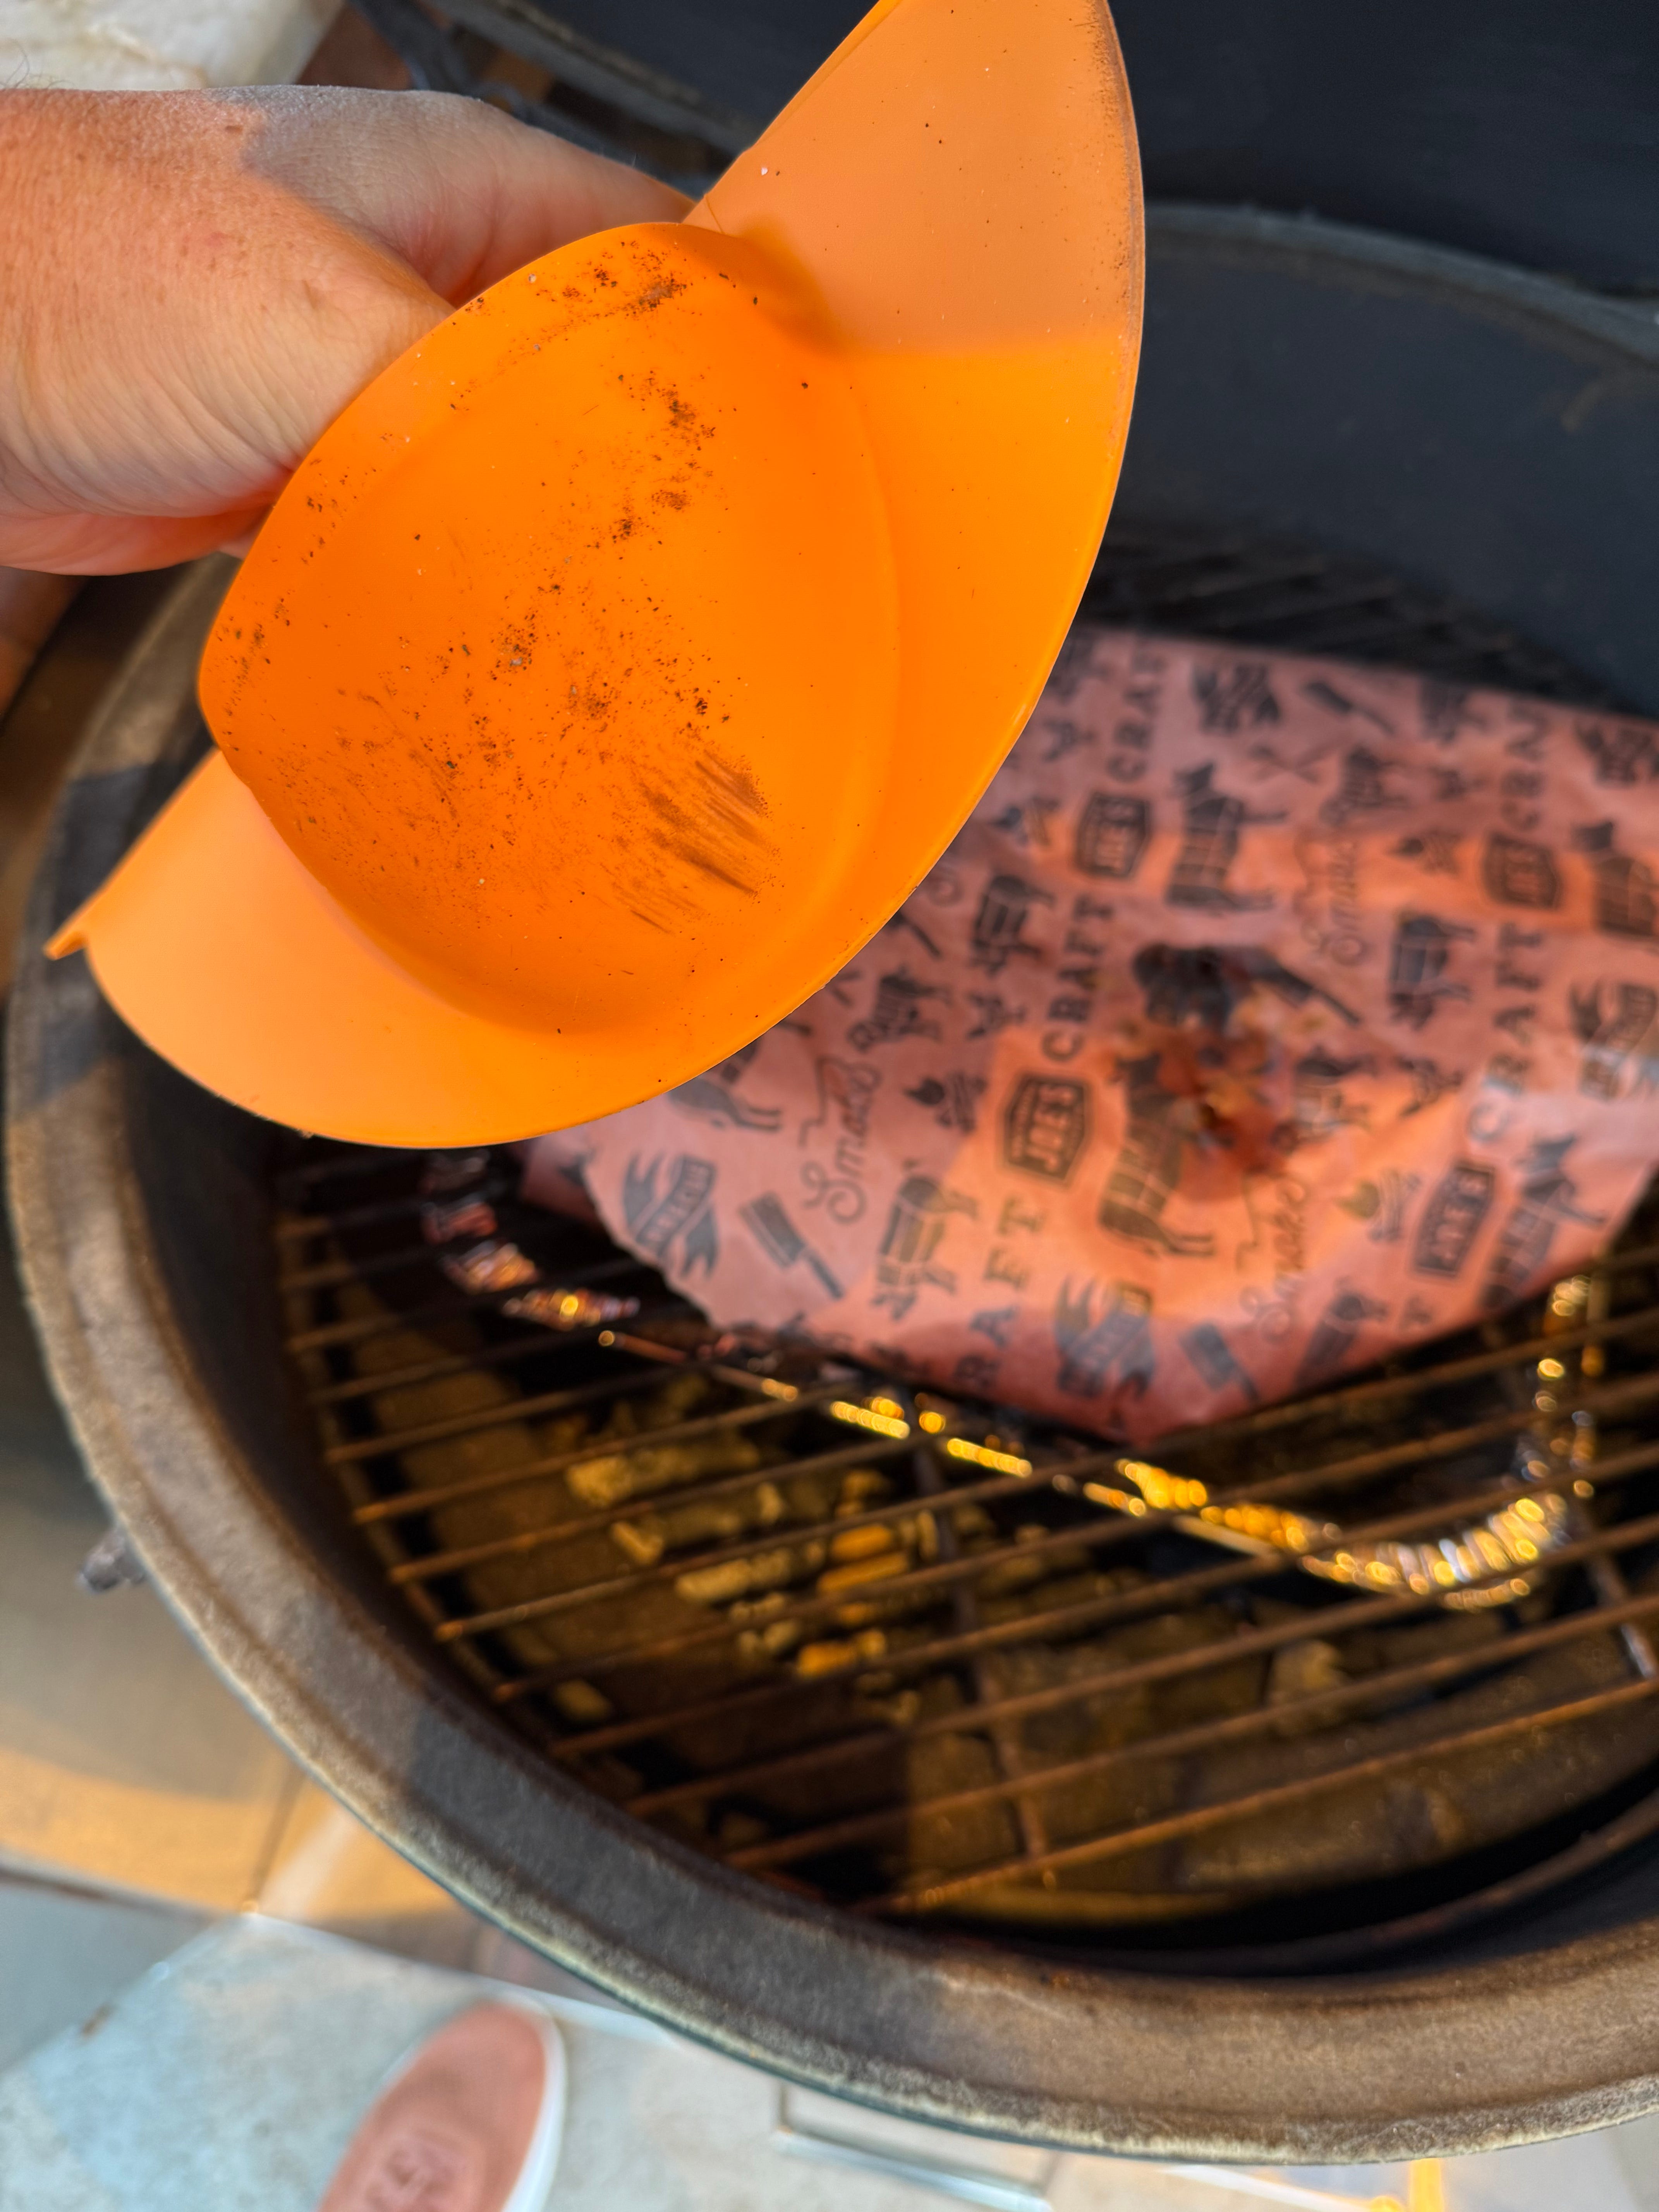
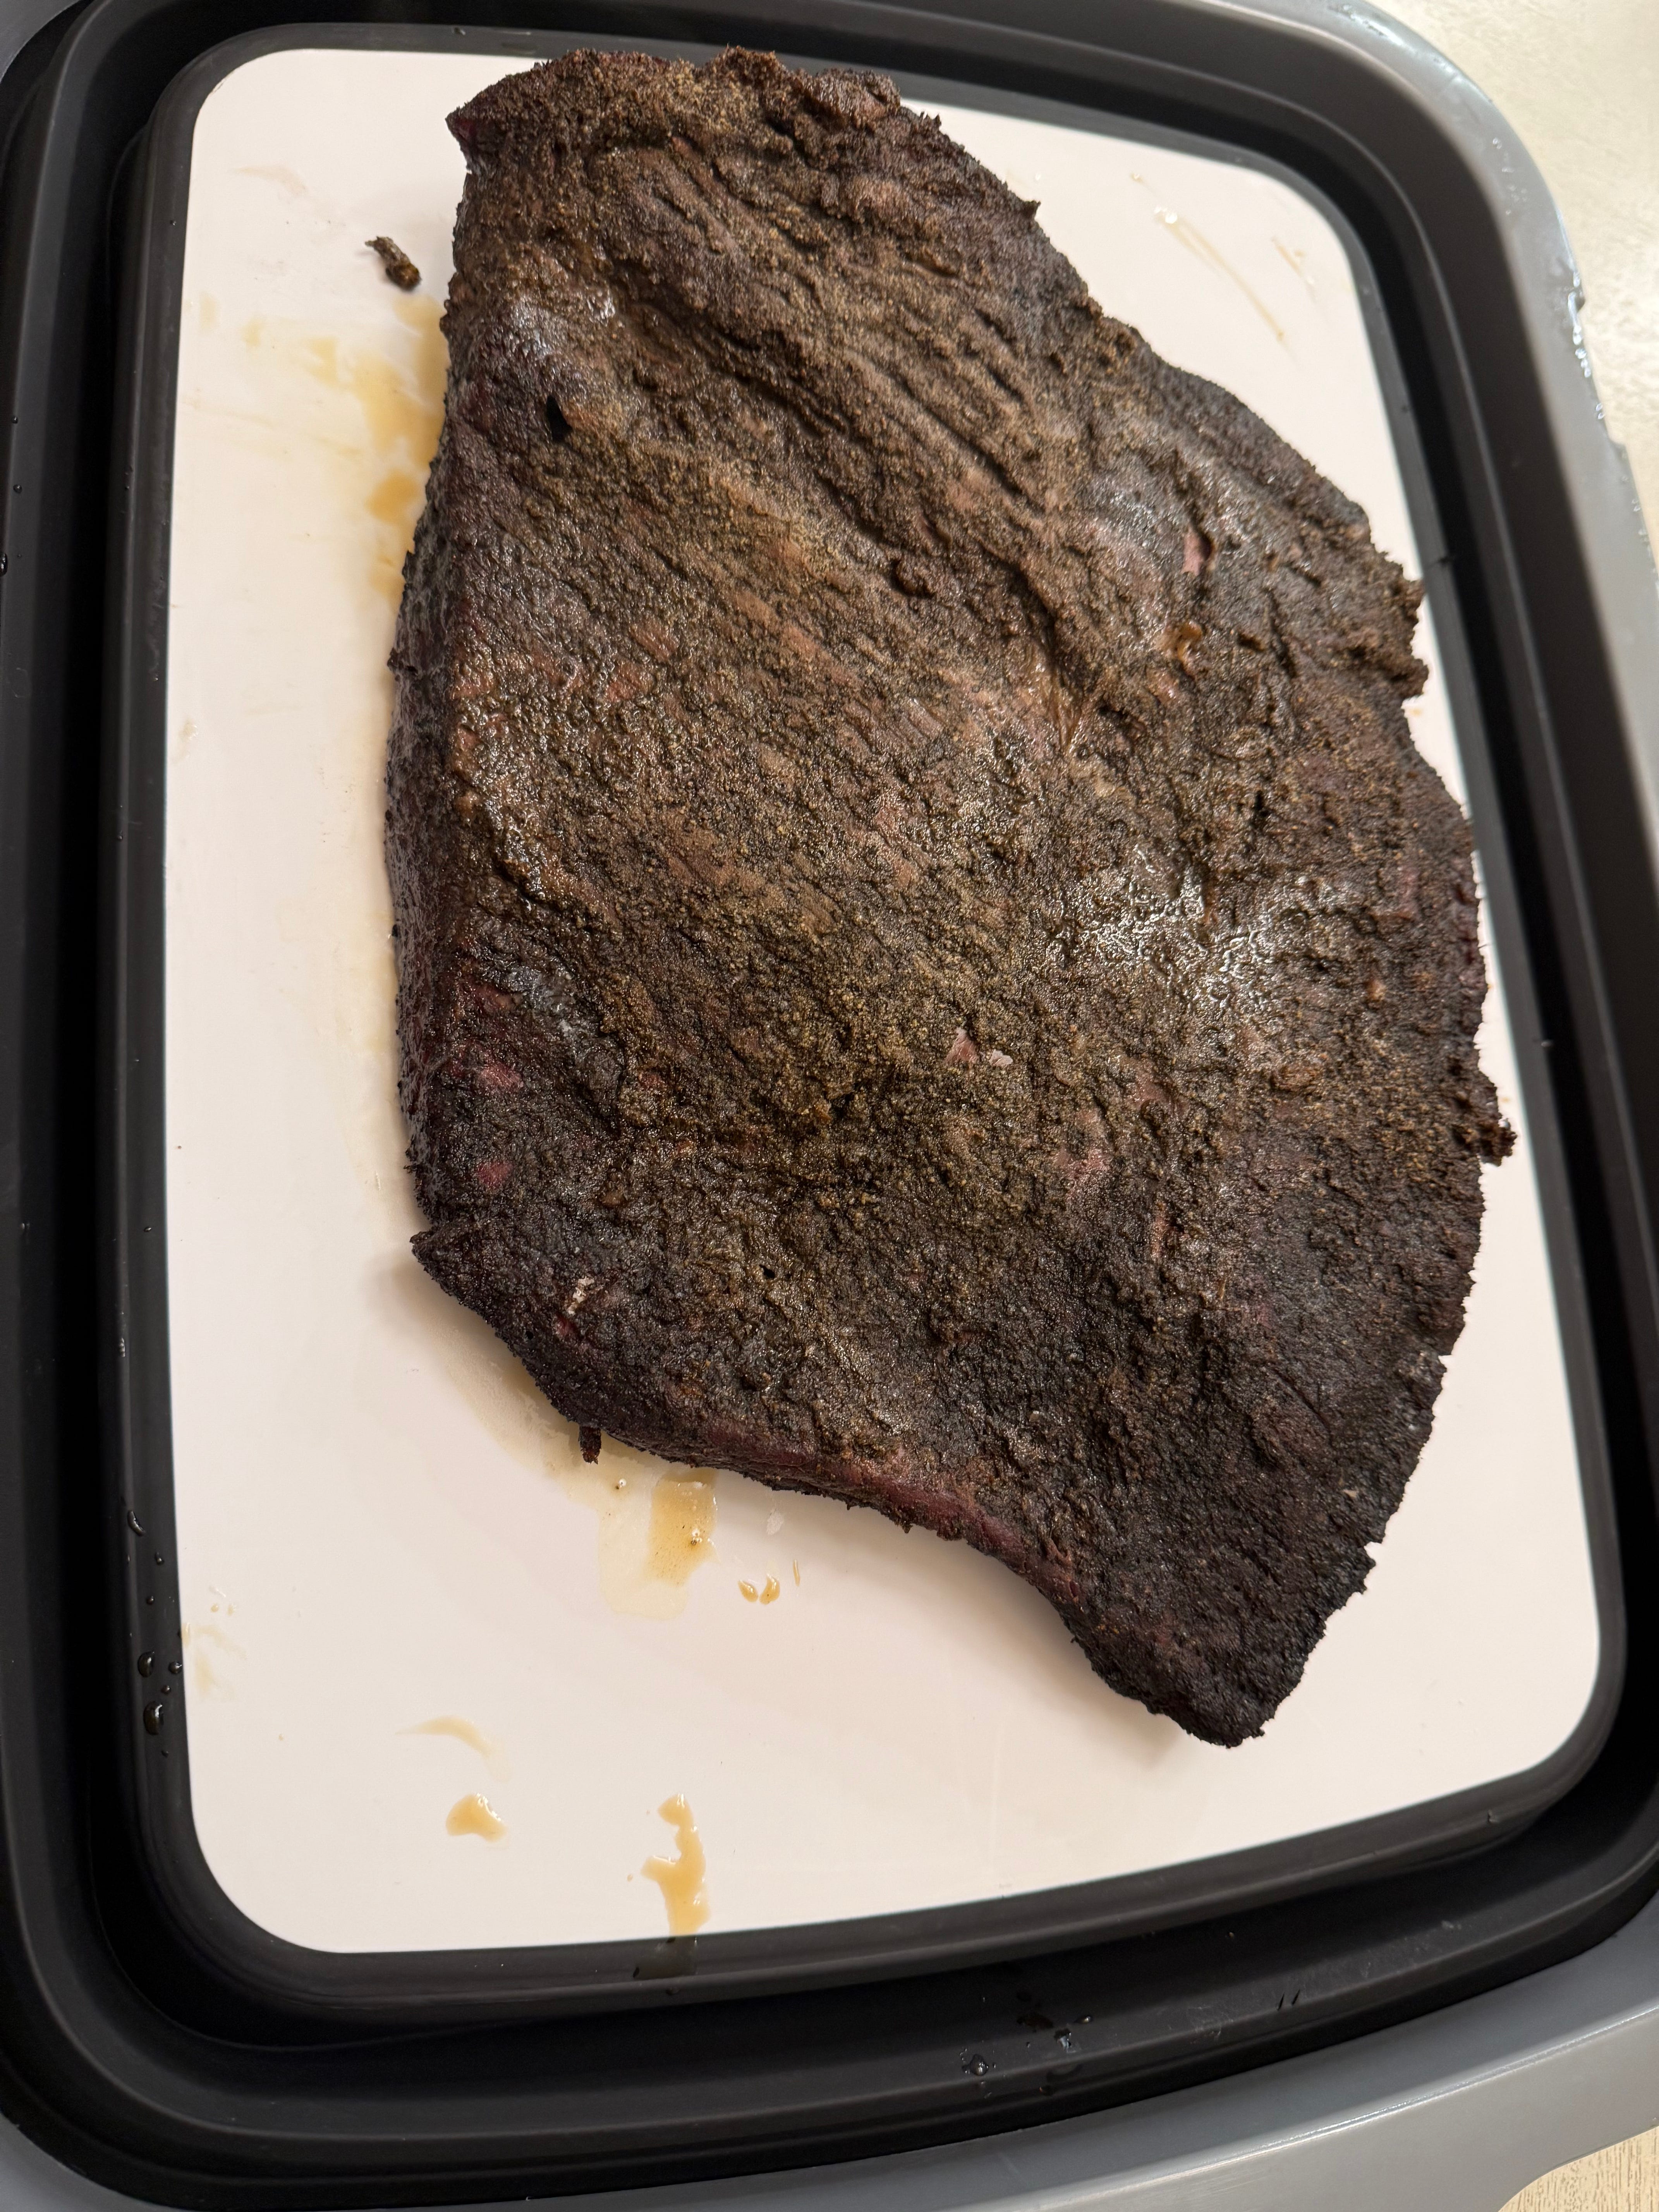
Once you’ve tightly wrapped the brisket, you can place it back on the grill until the temperature hits around 203°F.
Let it rest
We are one step closer, but we still need to let the brisket rest. Never rush barbeque. Letting the brisket rest allows the juices (and flavor) to reabsorb back into the meat. This improves texture, making the brisket more tender. Letting the meat rest also keeps the brisket from being dry, unlike what happens if you cut it without giving it proper rest time.
Take the brisket off the grill and remove any temperature probes that you have in. Keep it wrapped in the butcher paper and allow it to vent in the open for a few minutes. At this point, you need to place the meat in a cooler or rest blanket (which I prefer) to keep it warm without continuing to cook.
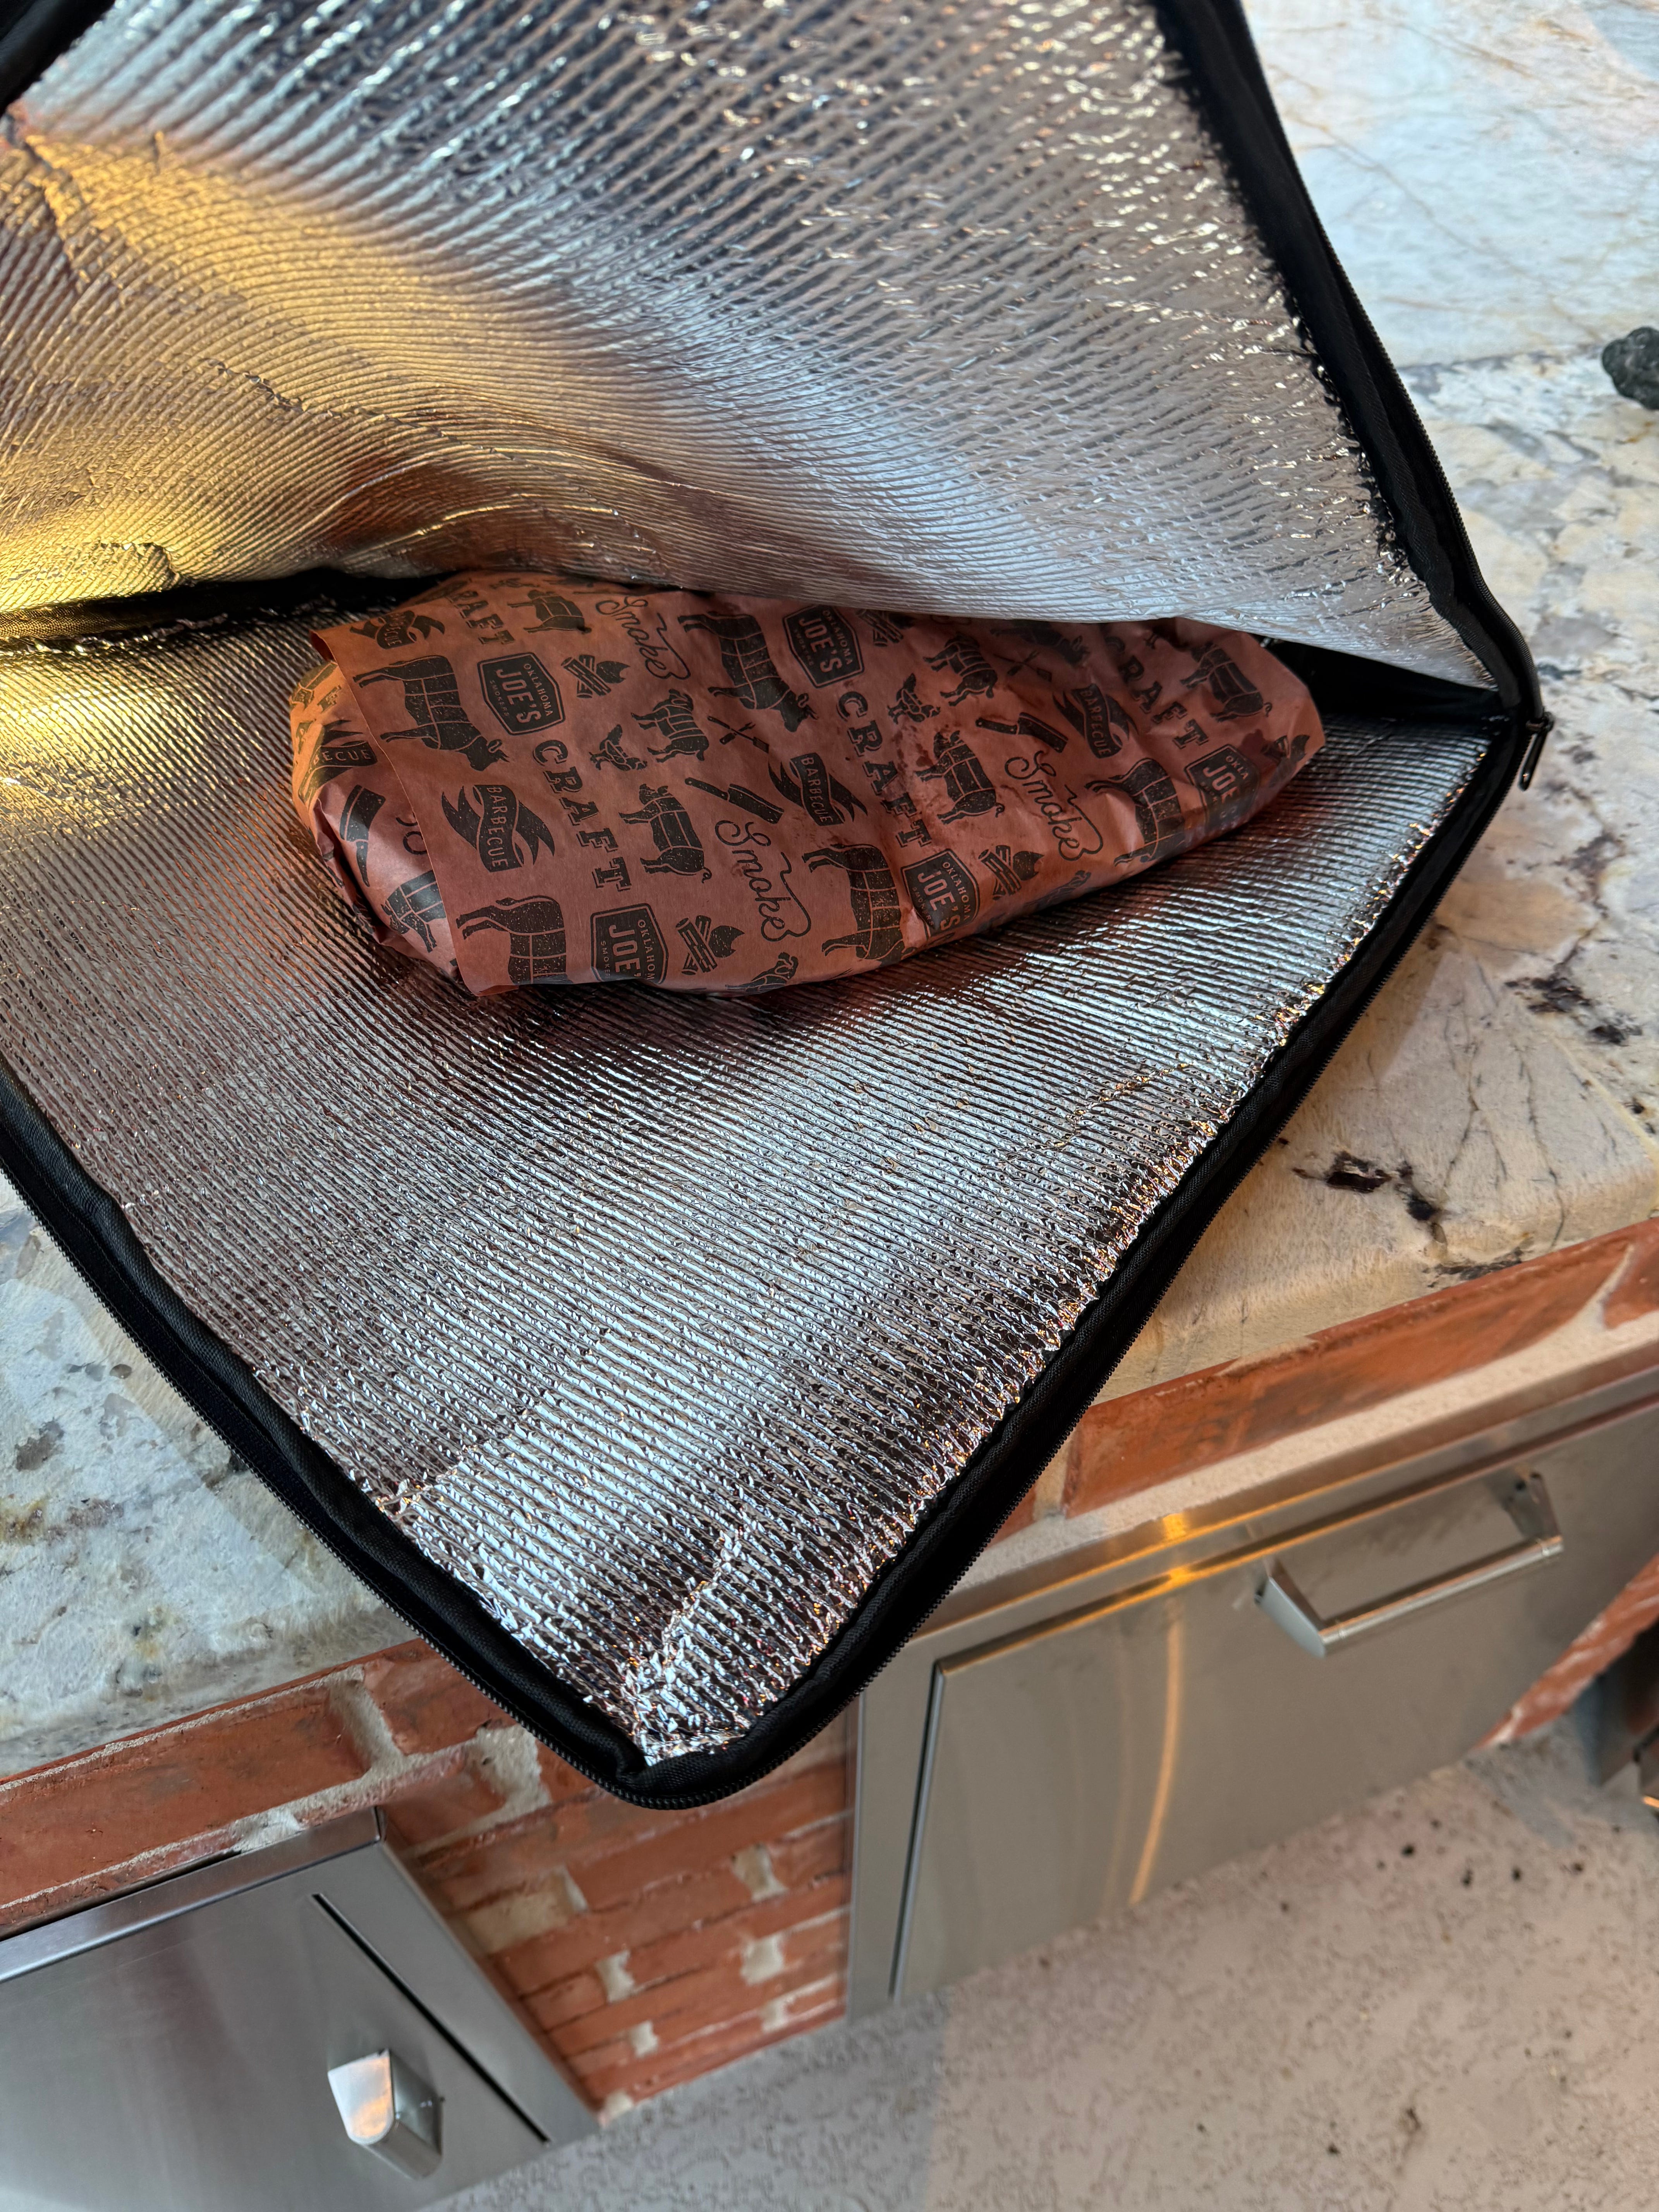
You should rest the brisket for at least 1 hour, but for the best results, aim for 2-4 hours.
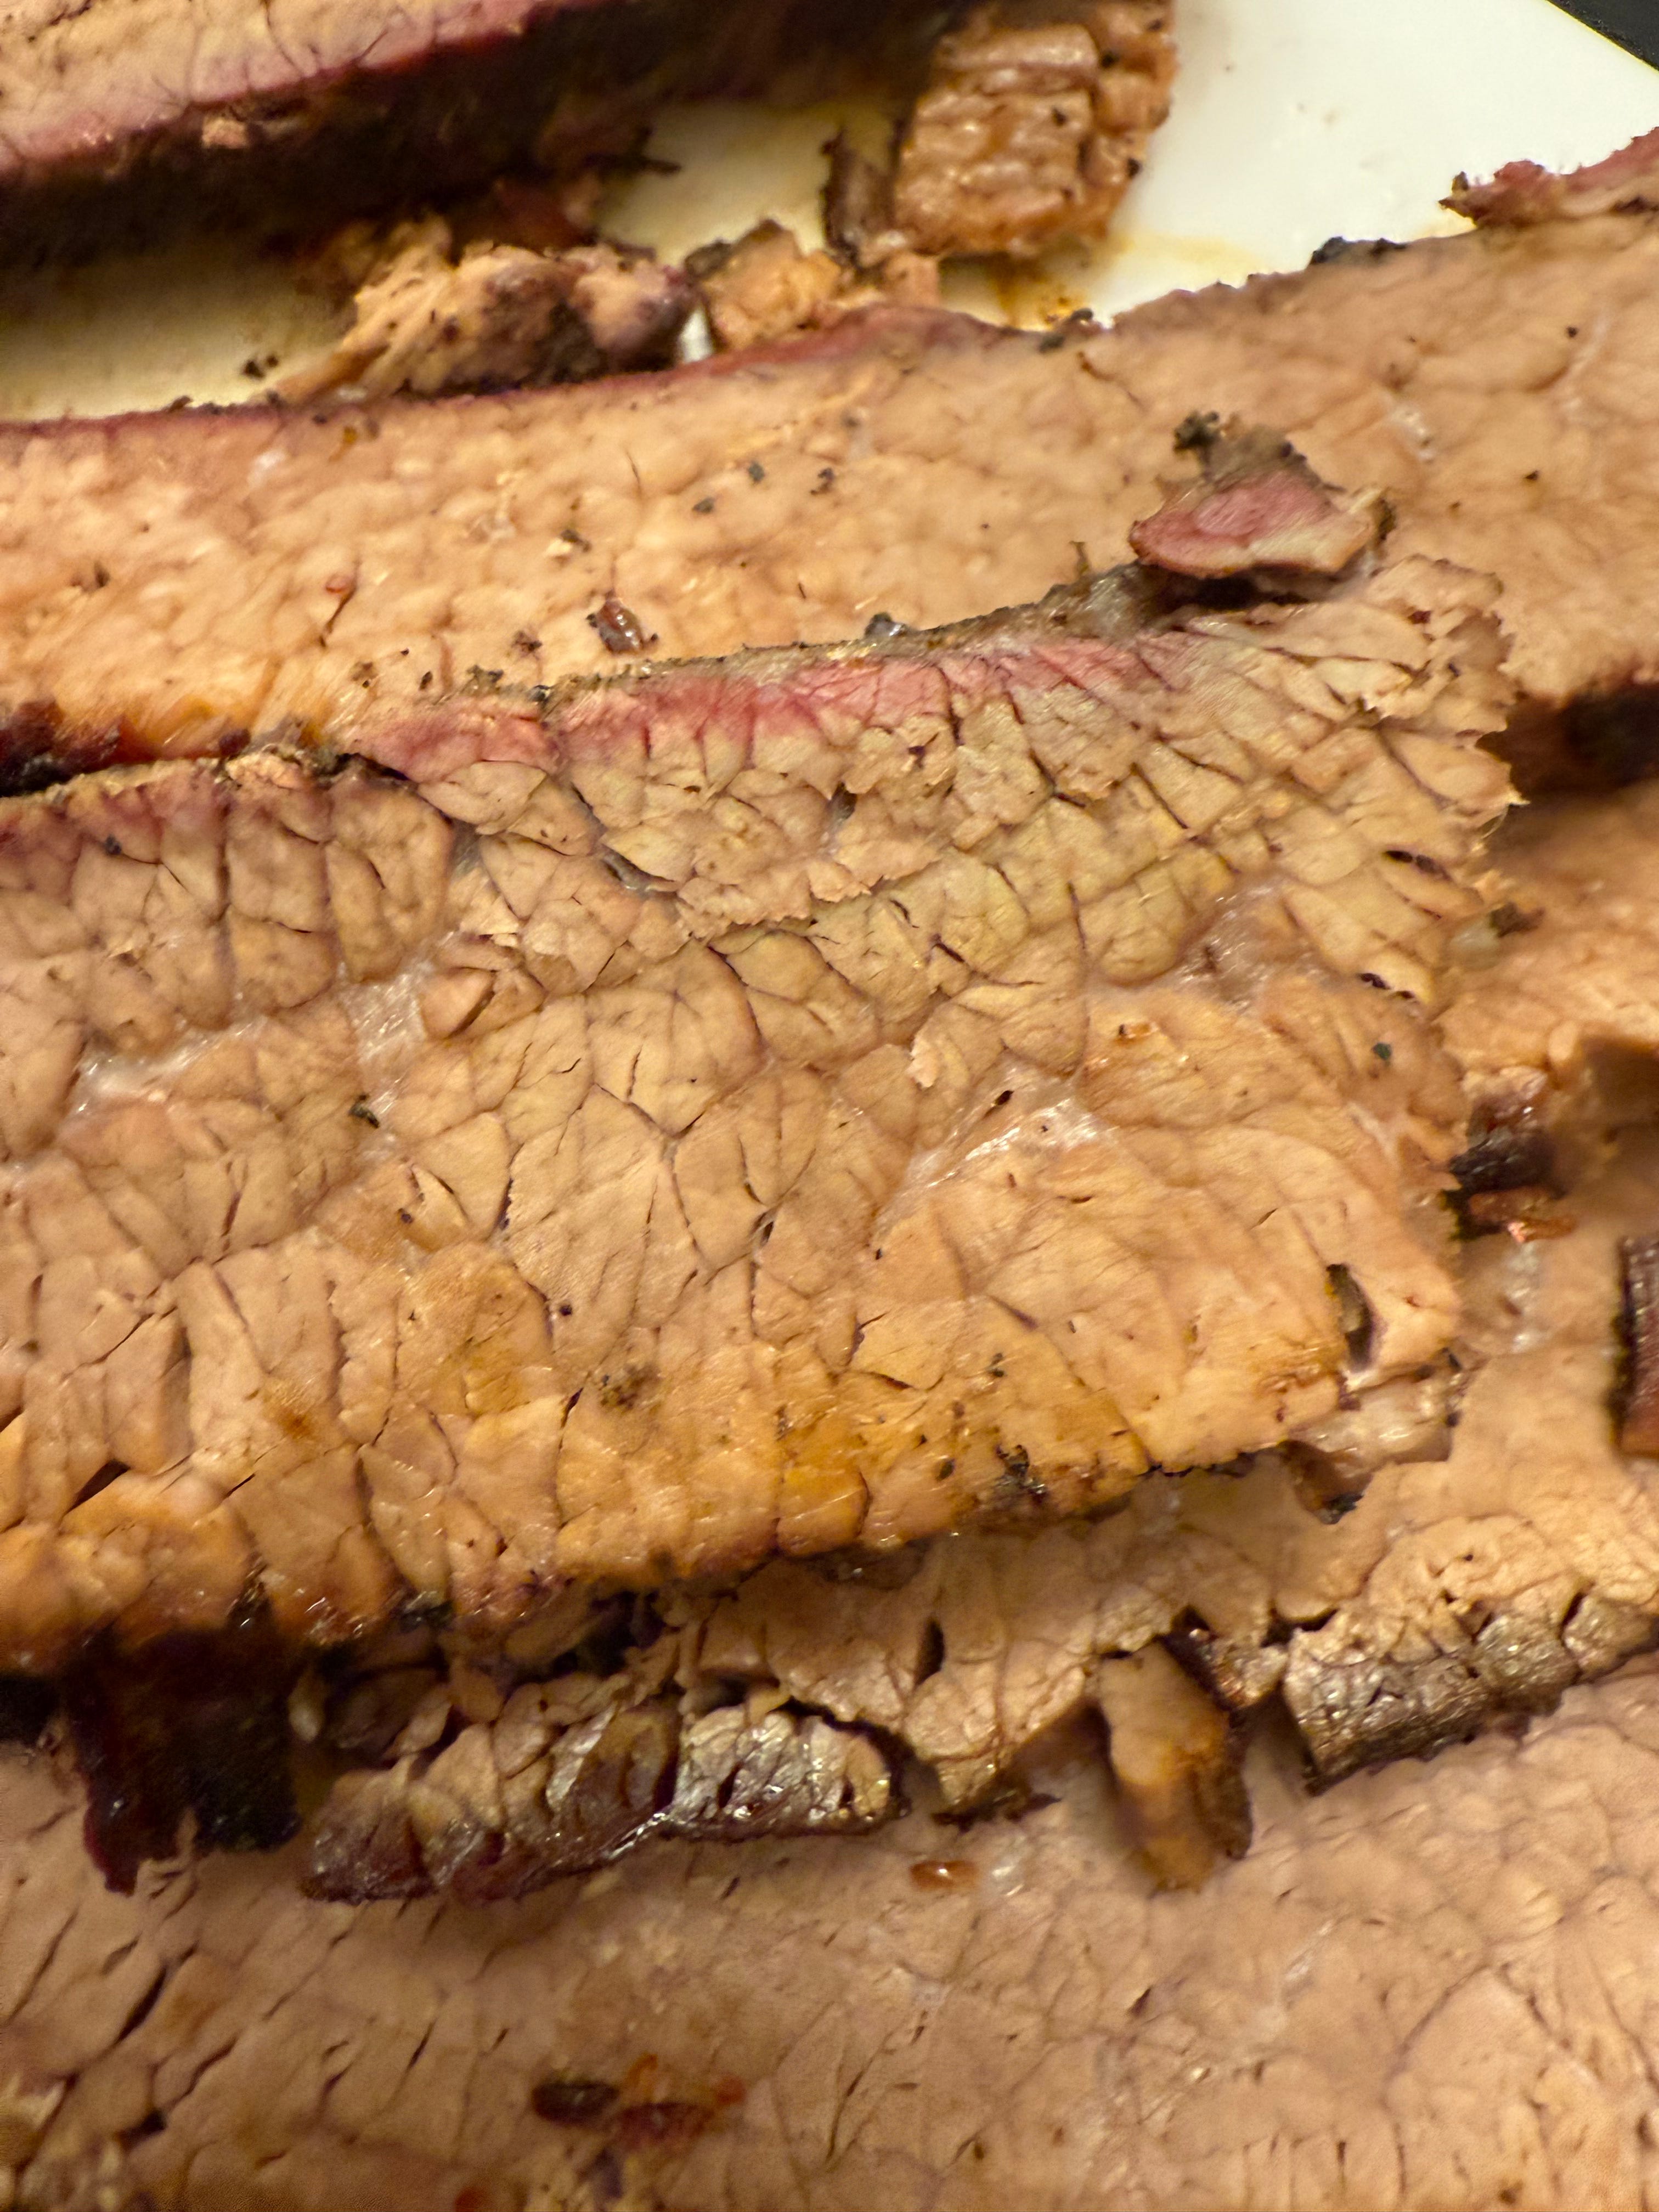
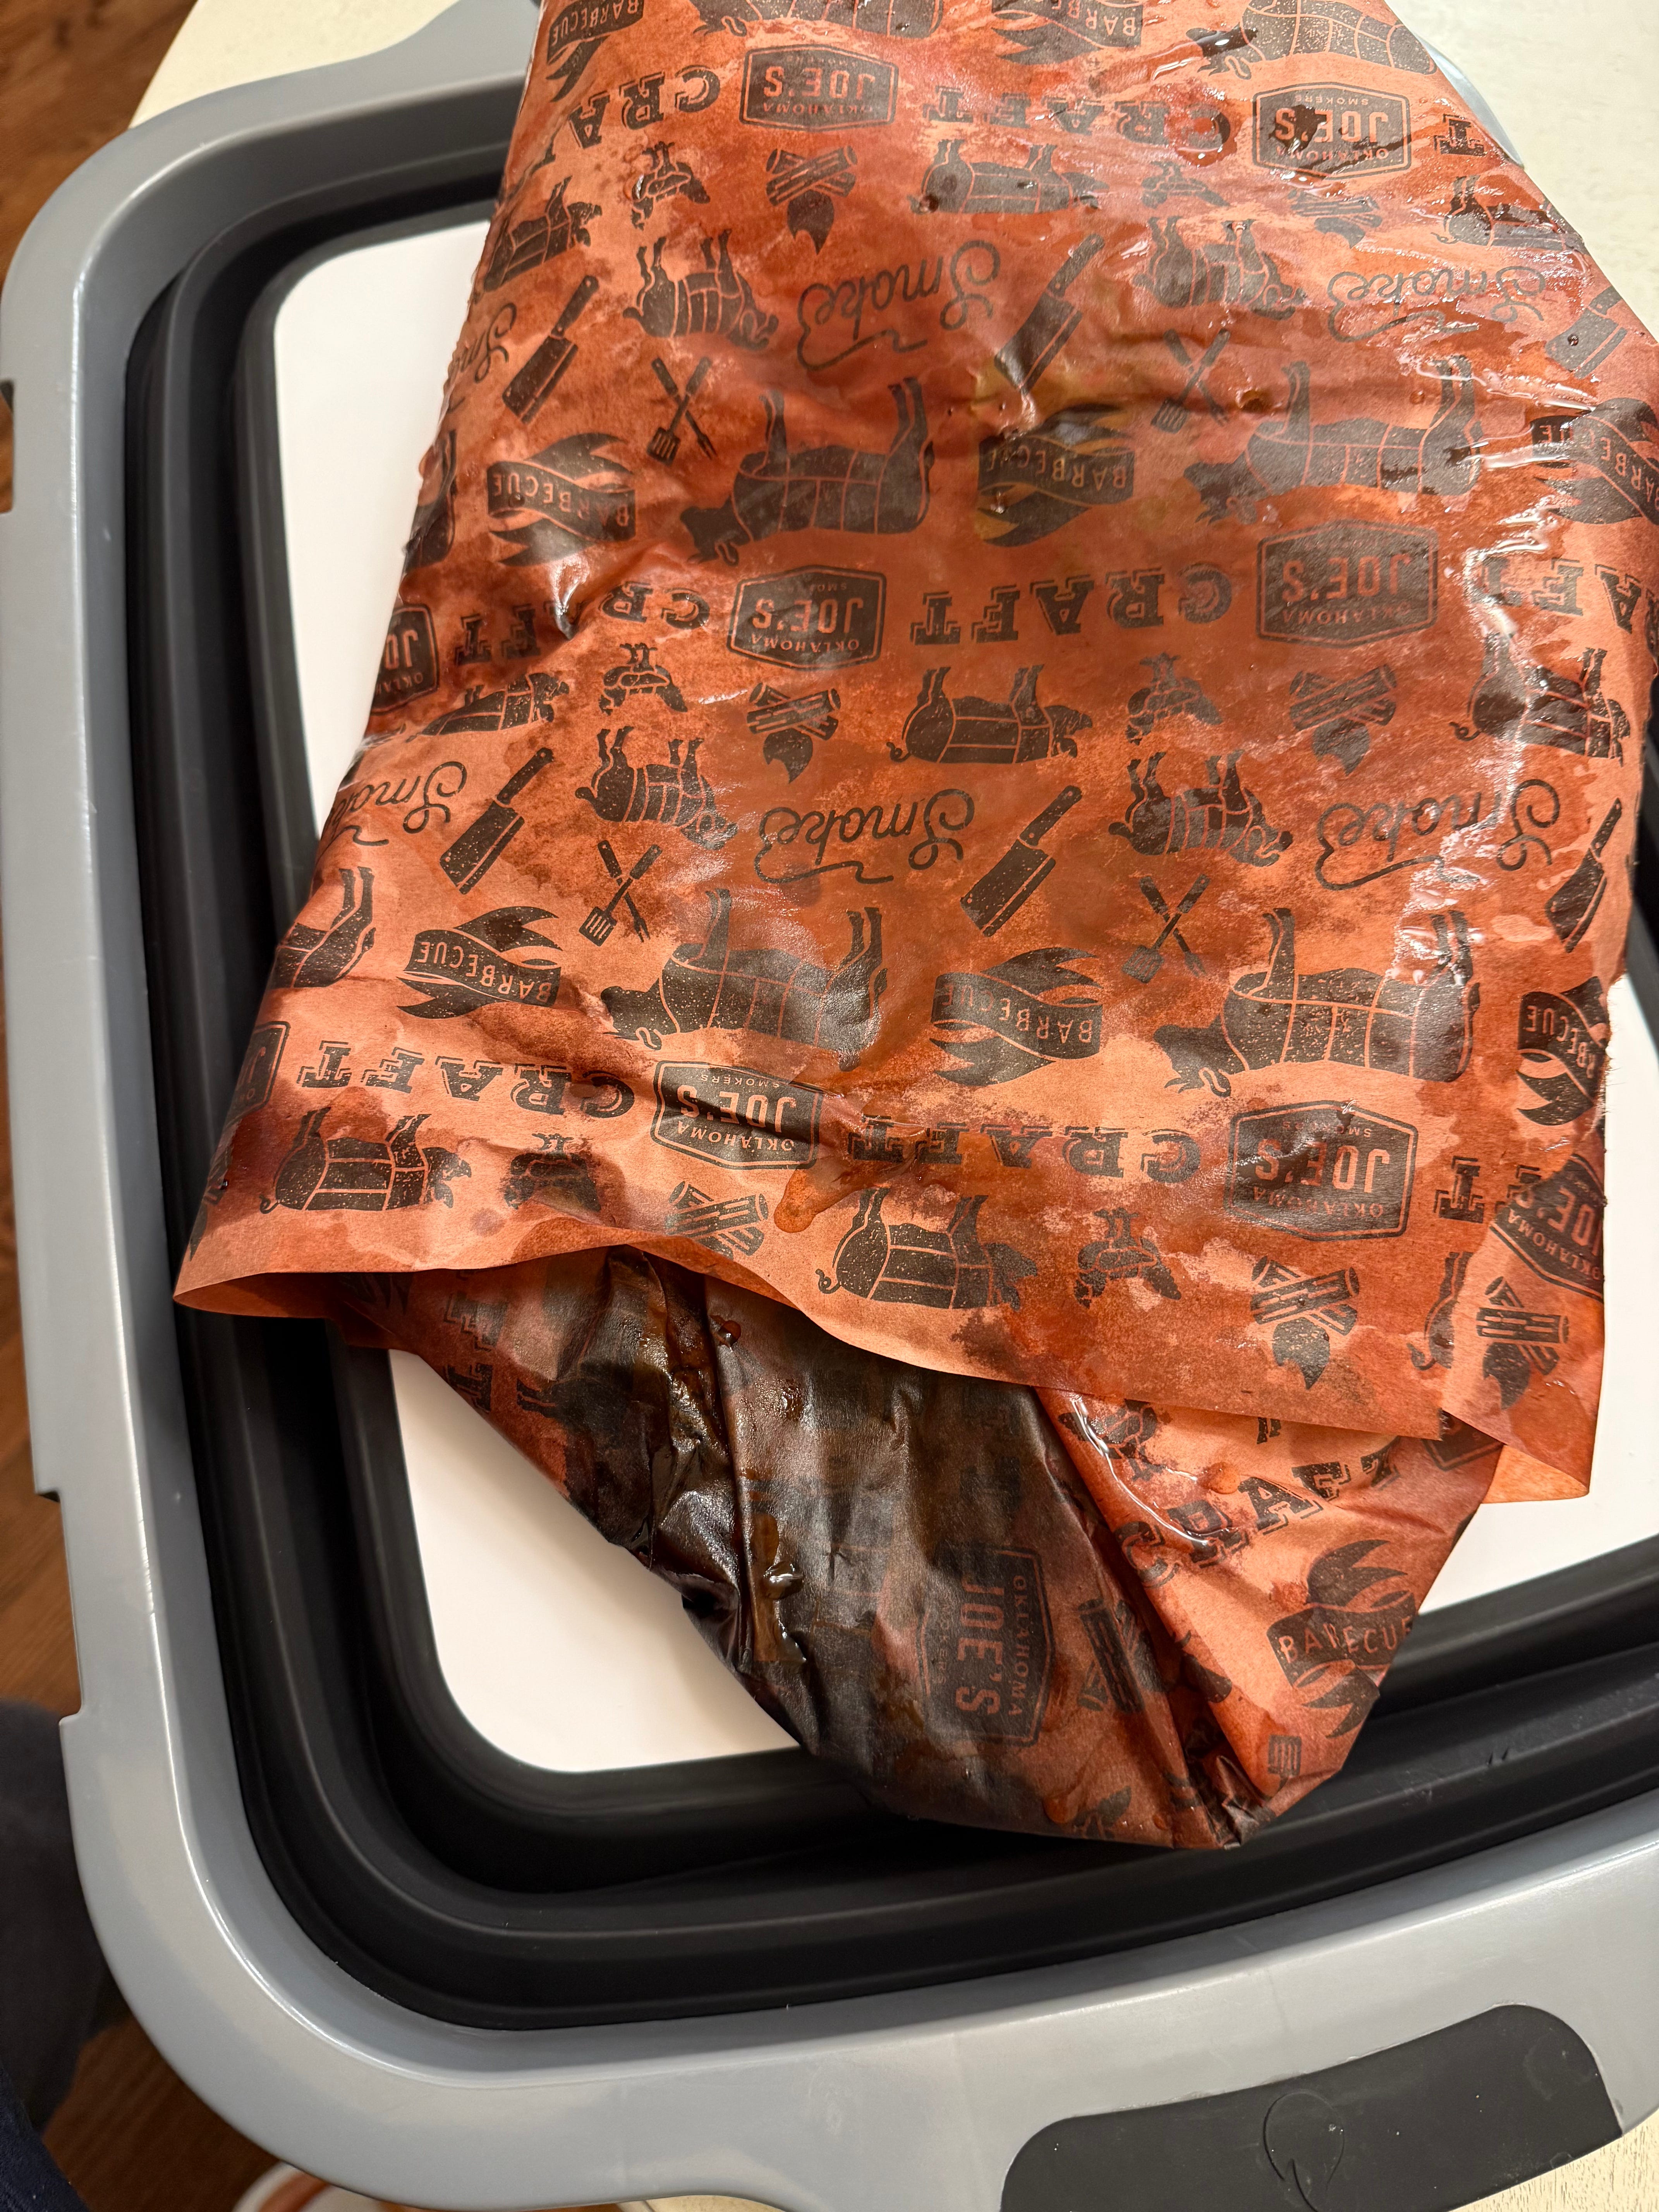
Slicing the brisket
You’ve made it! We’ll need to use the prep tub again or a sturdy cutting board with a groove to catch the juices. Make sure the knife you are using is sharp for nice, clean cuts. Start by unwrapping the brisket, and discarding the butcher paper.
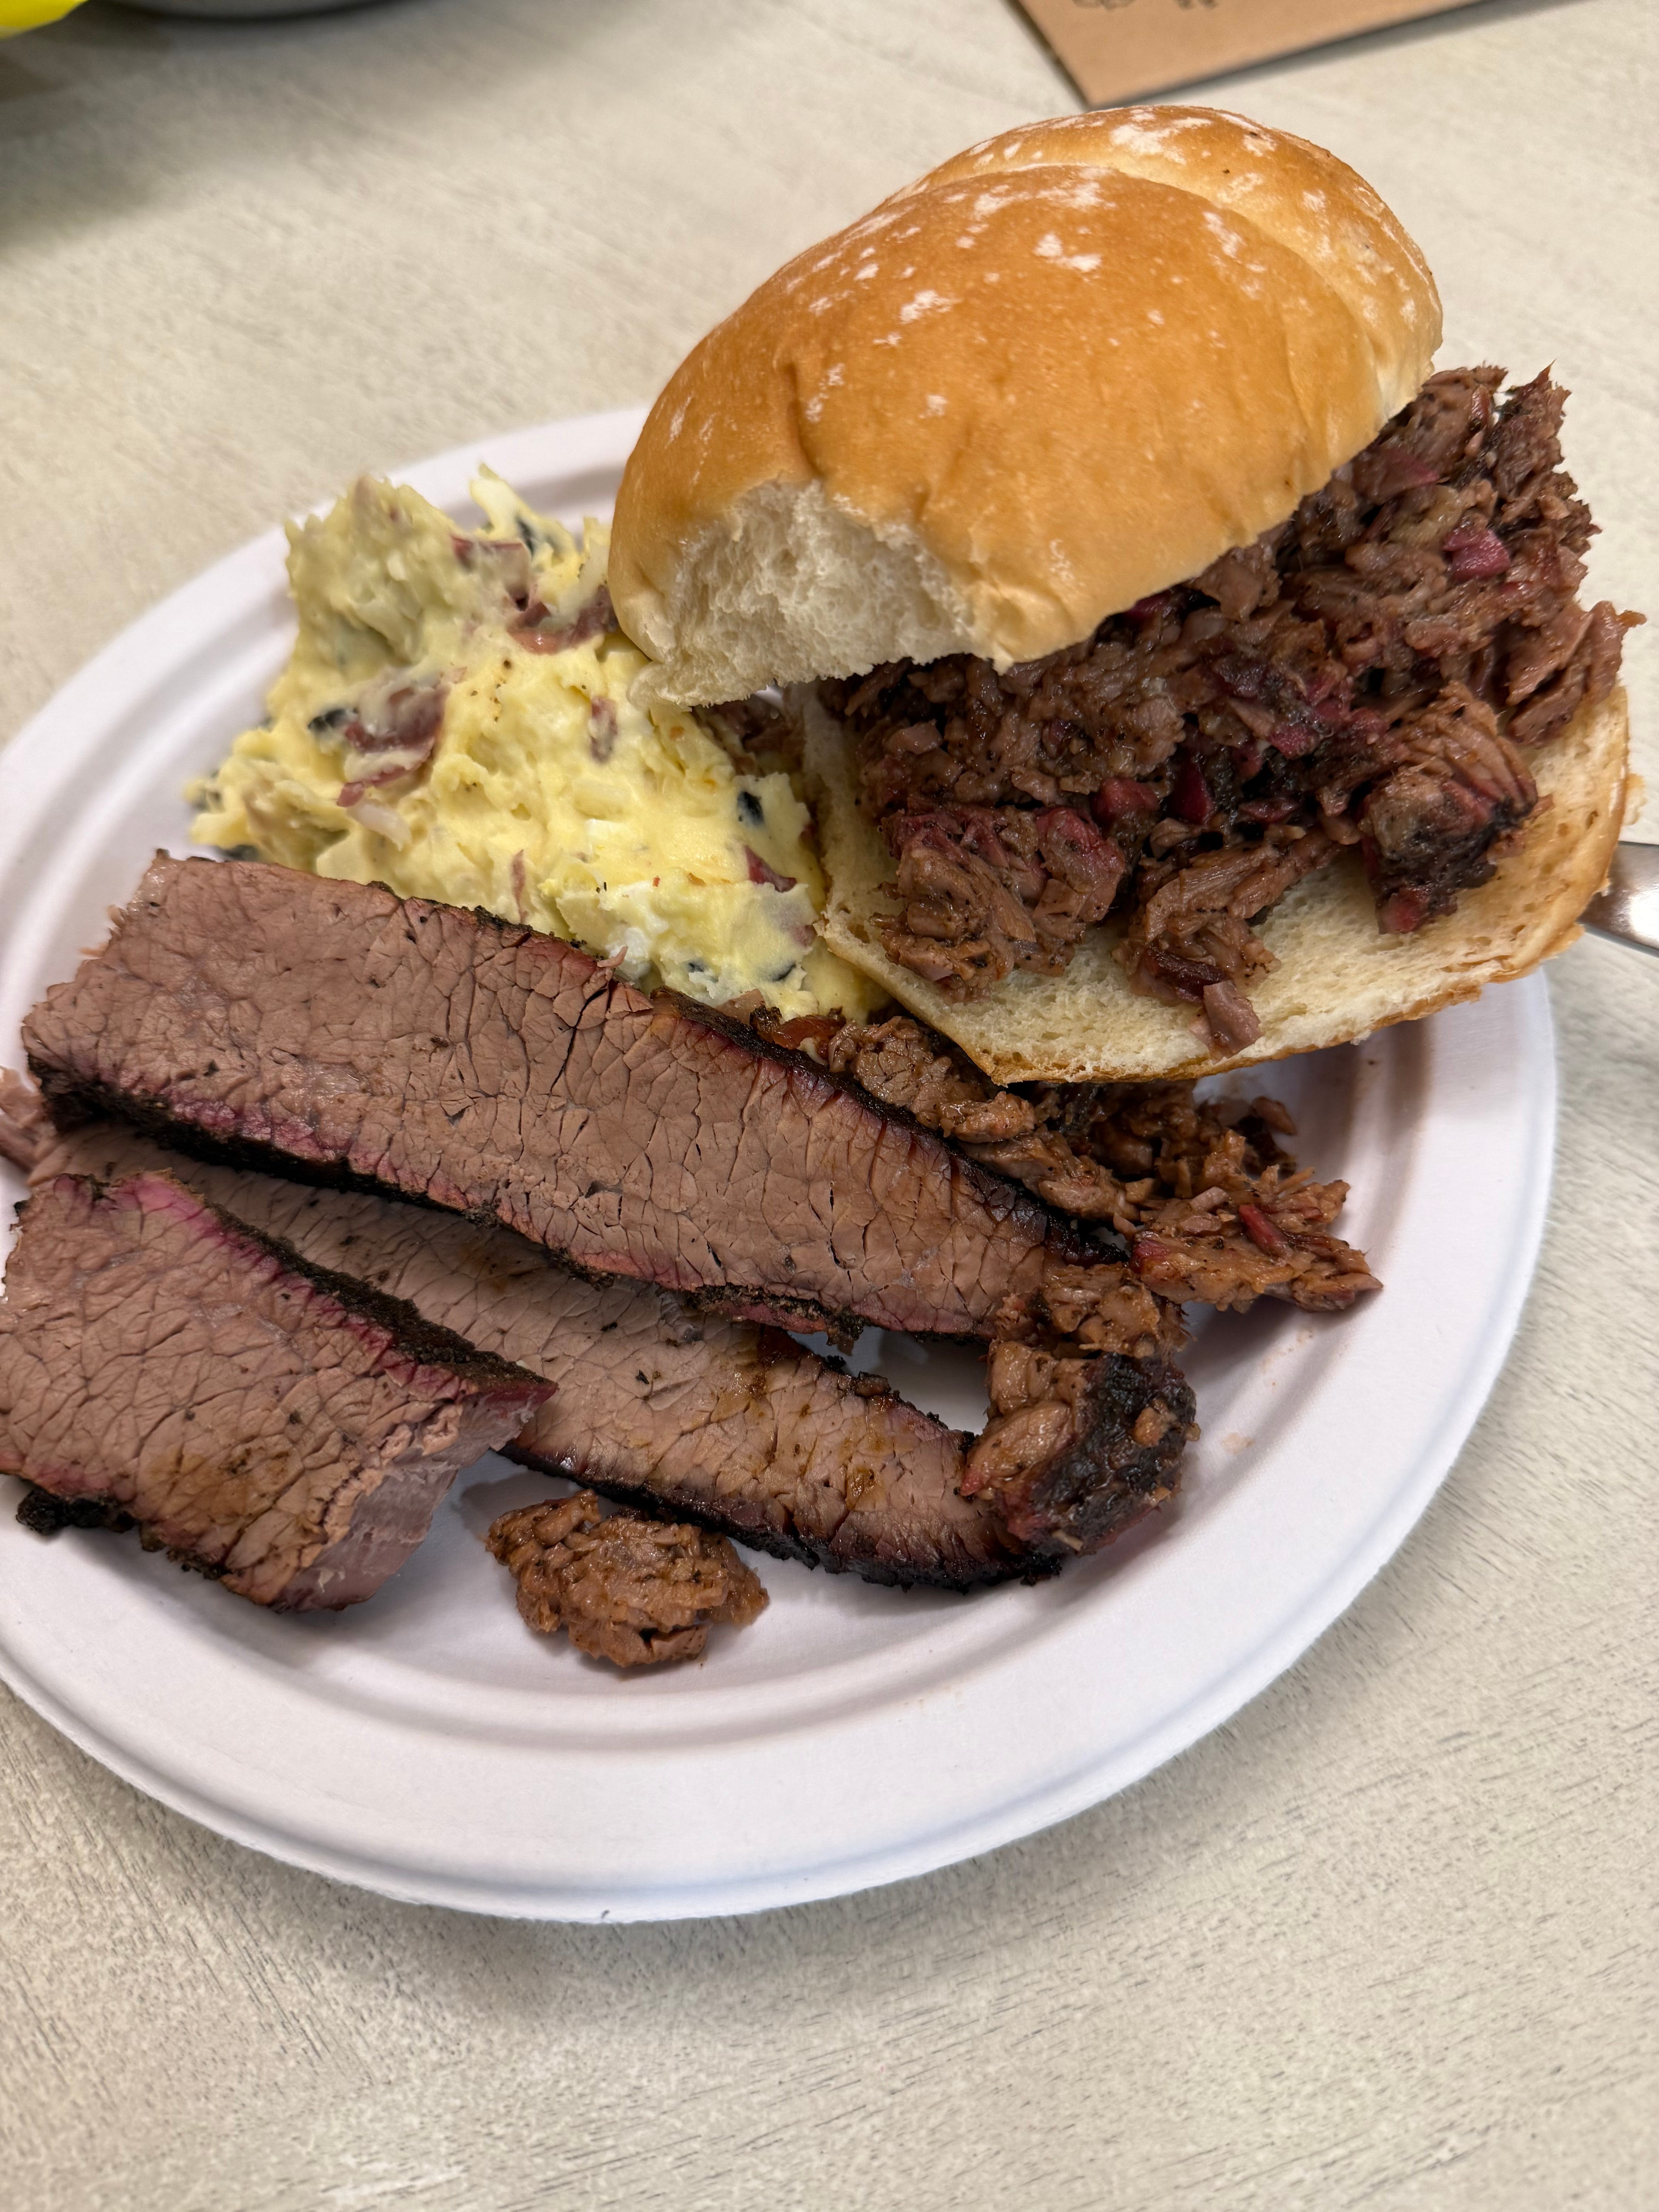
There are two parts of the brisket known as the point and the flat. These muscles run in different directions, so you’ll need to slice them separately. The point is the thicker, fattier, and more marbled section that we’ll use for chopped brisket or burnt ends; the flat is the leaner thinner section that we’ll use for sliced brisket.
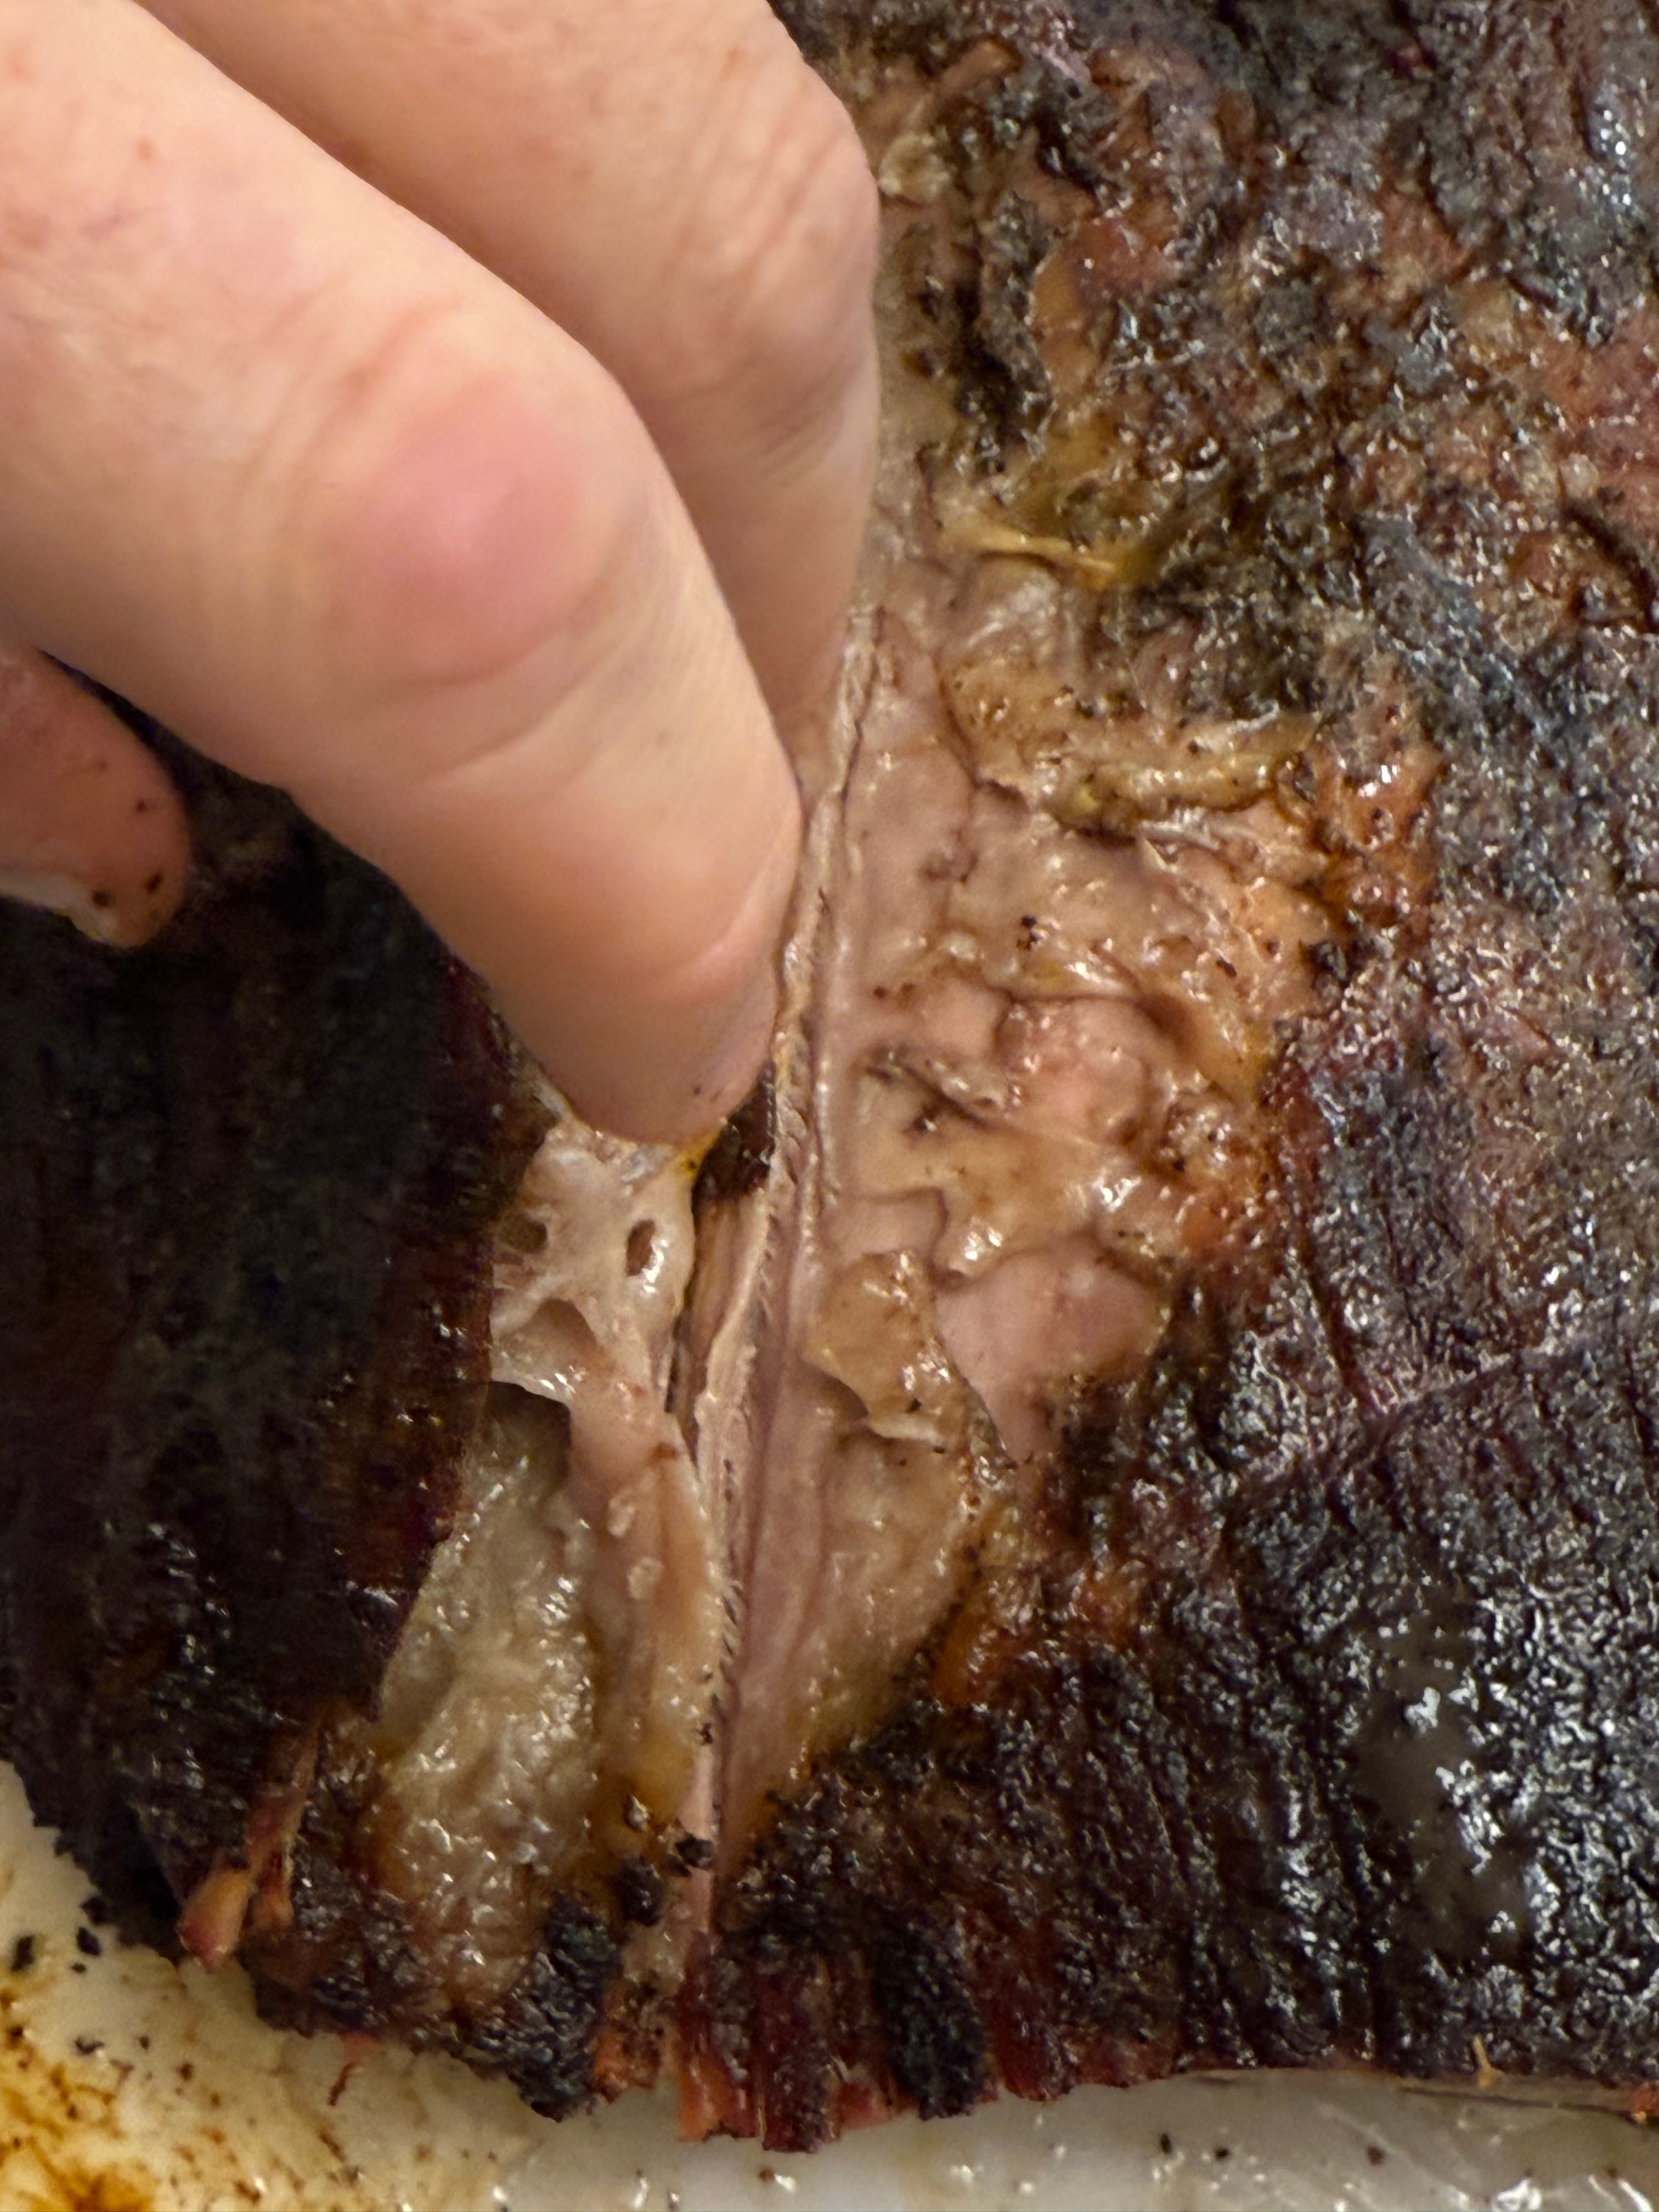
For a proper cut you need to find the grain of the meat. This is the direction of the muscle fibers. We’ll want to cut against the grain to create a more tender meal. Starting with the flat (the fat side), begin slicing at the thinner end of the brisket. Cut 1/4-inch-thick slices (or thicker if you prefer), making sure not to cut with the grain. When you reach the point where the grain changes direction, turn the brisket 90° and again slice against the grain. You can cut the point into thicker slices or chunks (great for burnt ends) or chop some up for a nice chopped brisket (this is where the extra fat on the point creates more flavor). Save the juices that come off the meat and pour over the top of your brisket before you eat.
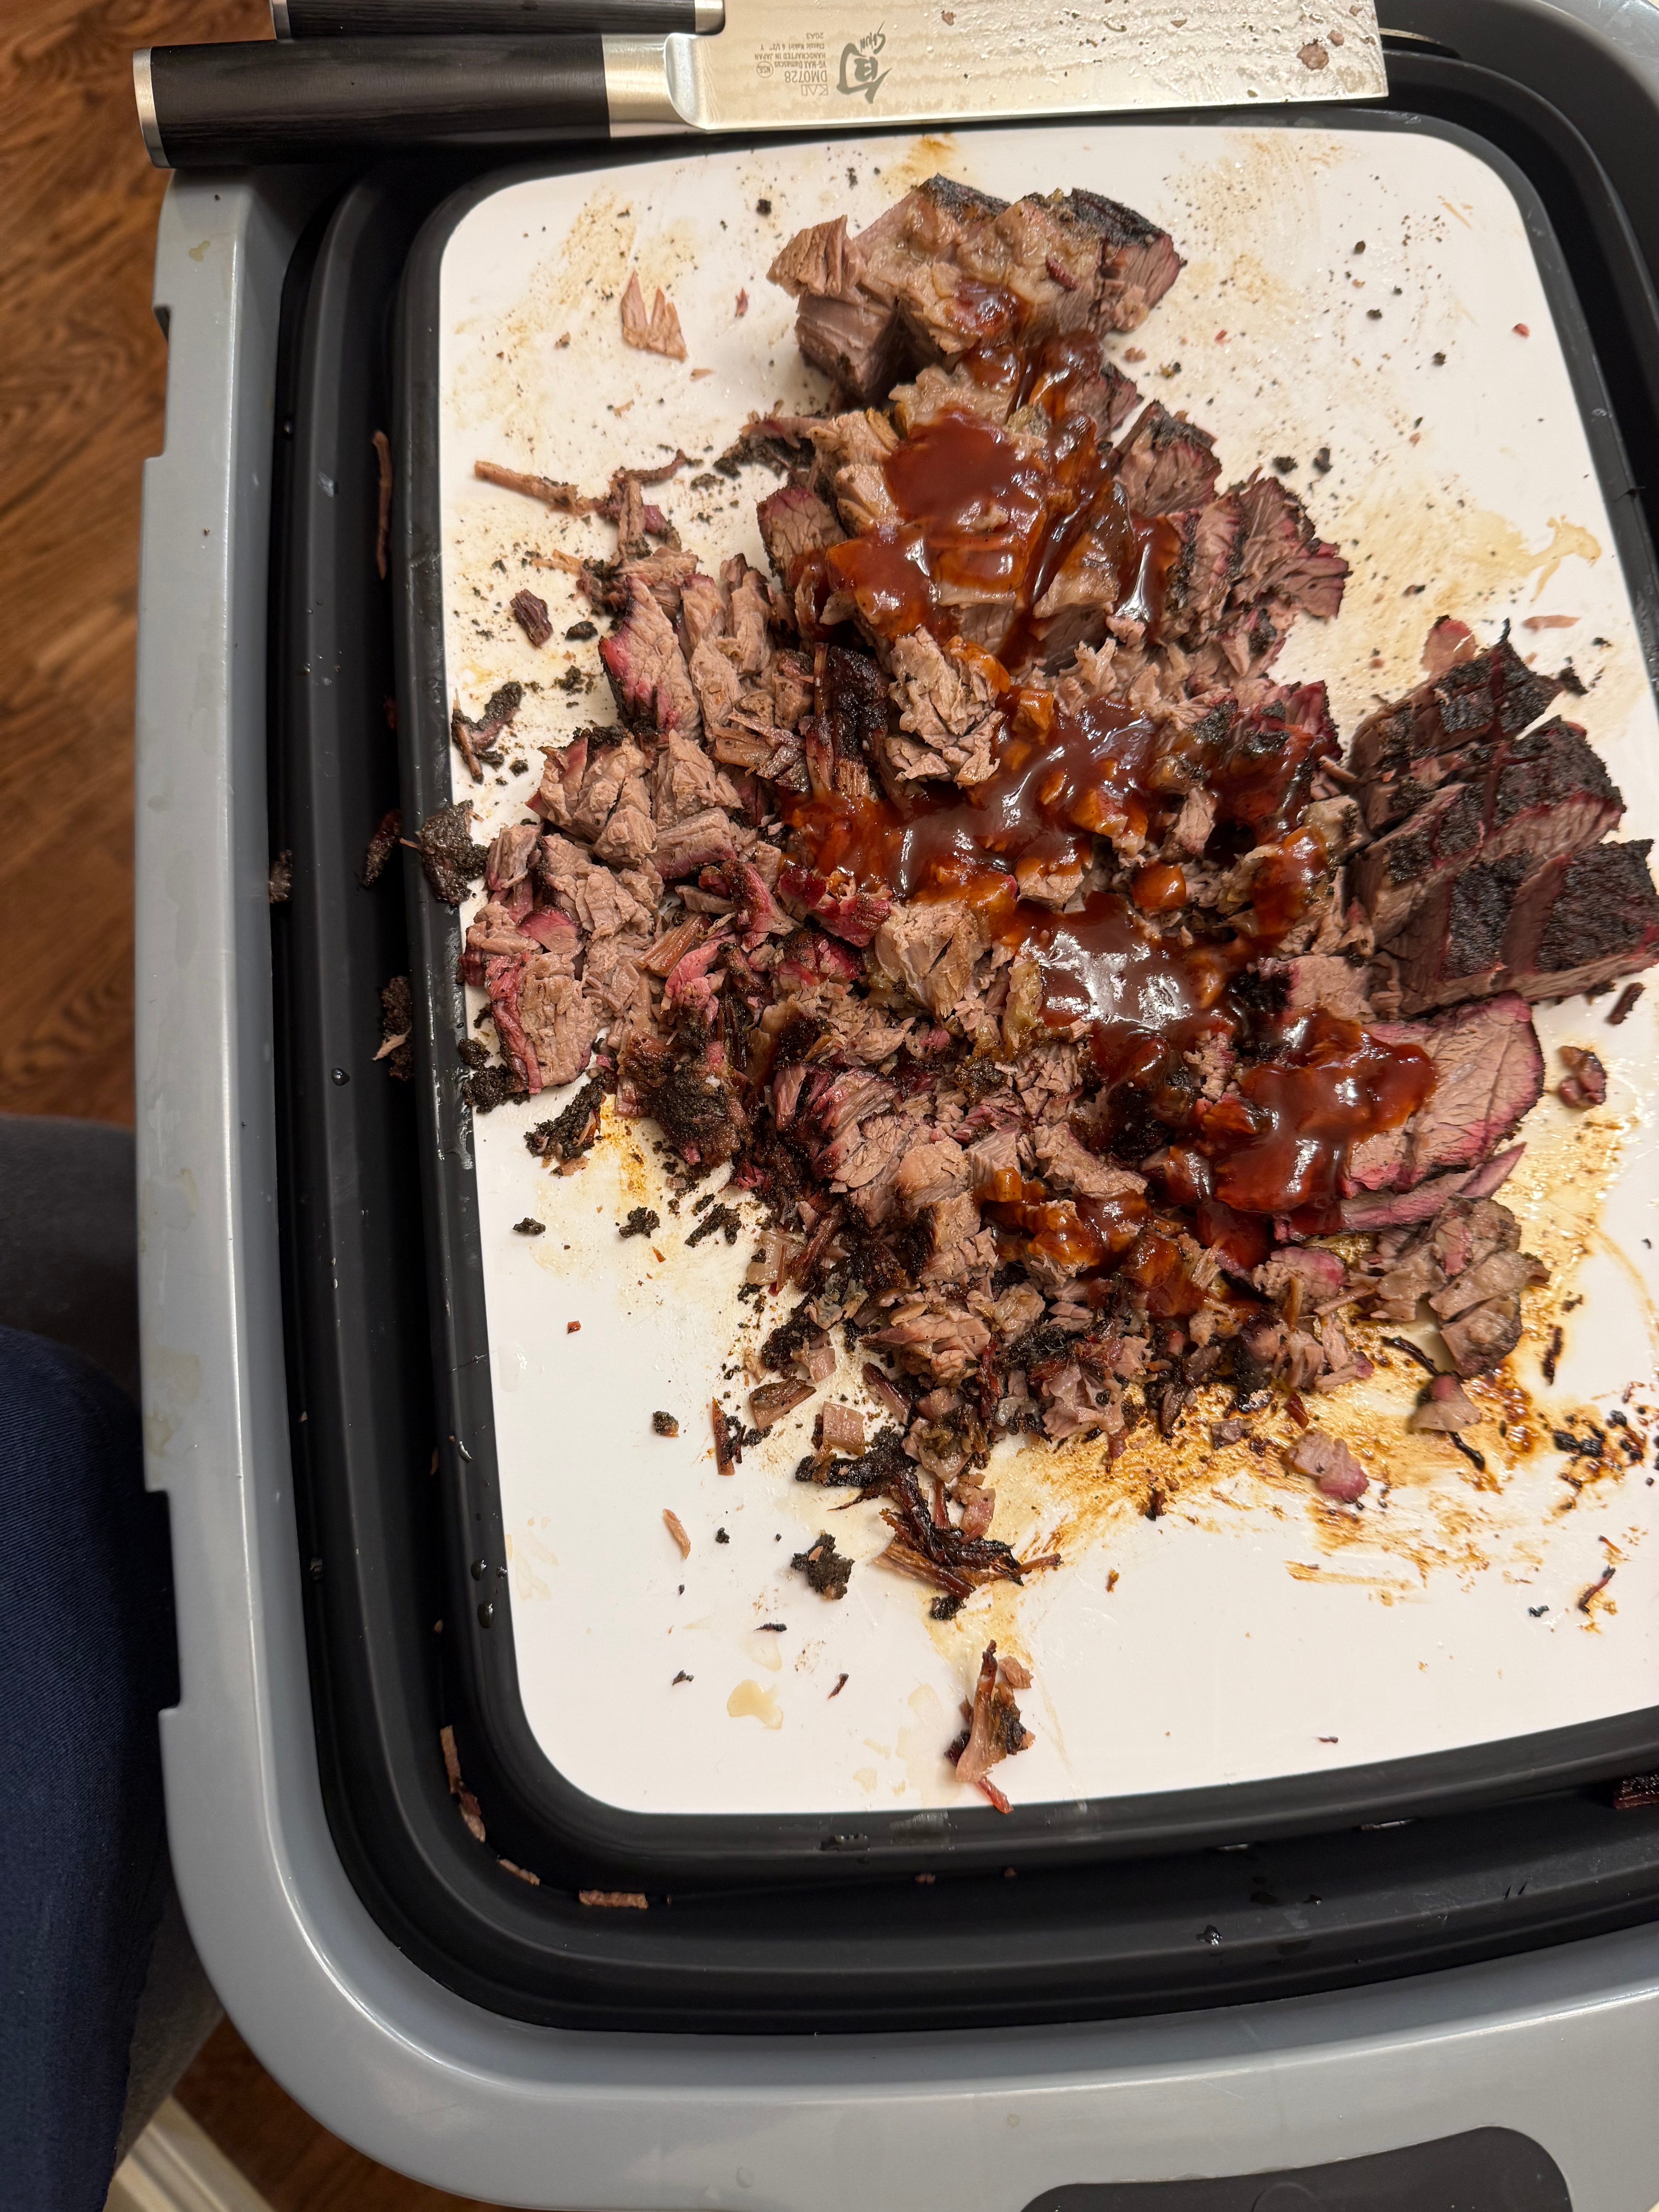
Serve with homemade potato salad and enjoy!
Great post! We’re pretty tight on space. Thoughts on the small green egg? Too small for ribs or brisket?